
Ever wondered what’s involved in a wide-body conversion? We follow the build of a Mustang GT
Words: Rixsta Photos: Rixsta Photography / Renier Ackerman
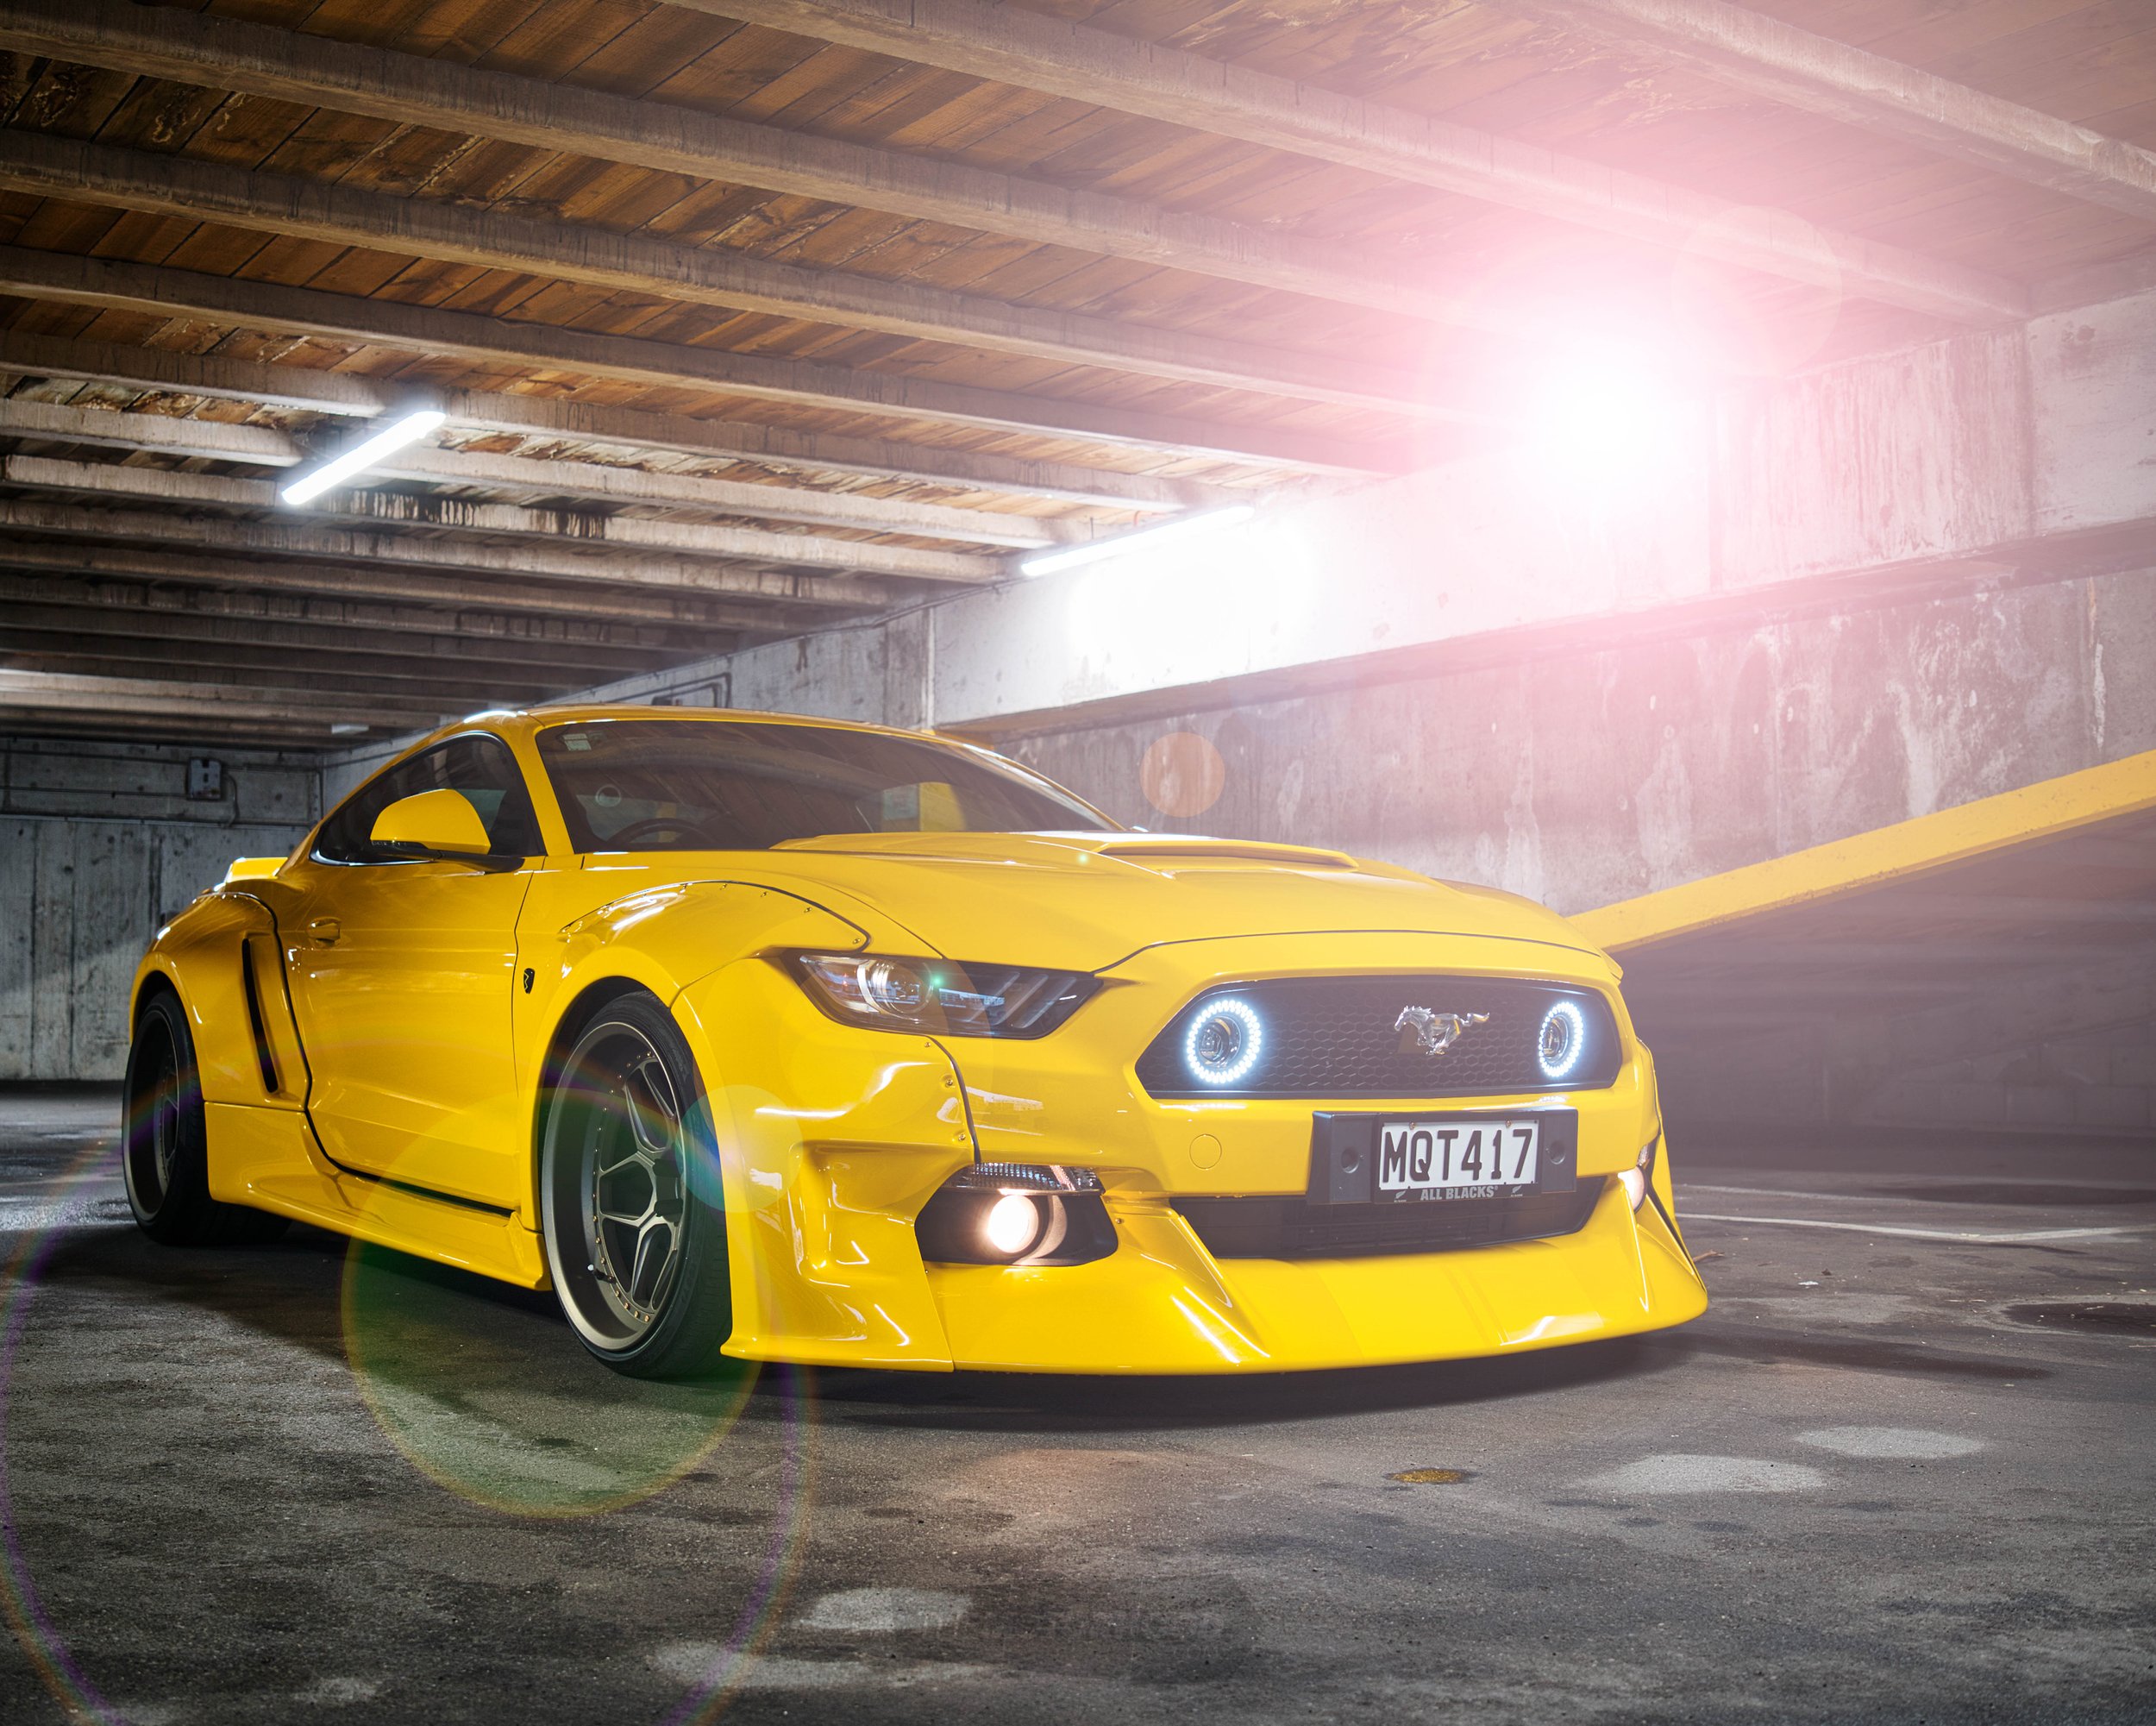
There are plenty of wide-body Mustangs in circulation across the county, but when Renier Ackerman, owner of this 2017 Mustang GT, wanted to stand out in the crowd, and have the widest pony in all the land, he ordered the biggest and baddest on the market from USA company Clinched.
We followed the installation at Customs Body Shop — a procedure that is much more involved than you might think, especially when ensuring it’s all done to the letter of the law. Yip, this type of work requires the approval of Johny Law. On a modern car like the Mustang, this is actually a very complex process. So, before you go sinking the cut-off wheel into your modern muscle, seek some professional advice from your certifier.

Mock and Measure
Ben Martin — director of Customs Body Shop — who has a vast knowledge of bodykits, tells us that as far as bodykits go, Clinched, out of the box, would have to be one of the best he’s come across. With perfect panel gaps and made from a reinforced ABS plastic as opposed to fibreglass, the fitment is fairly straightforward.
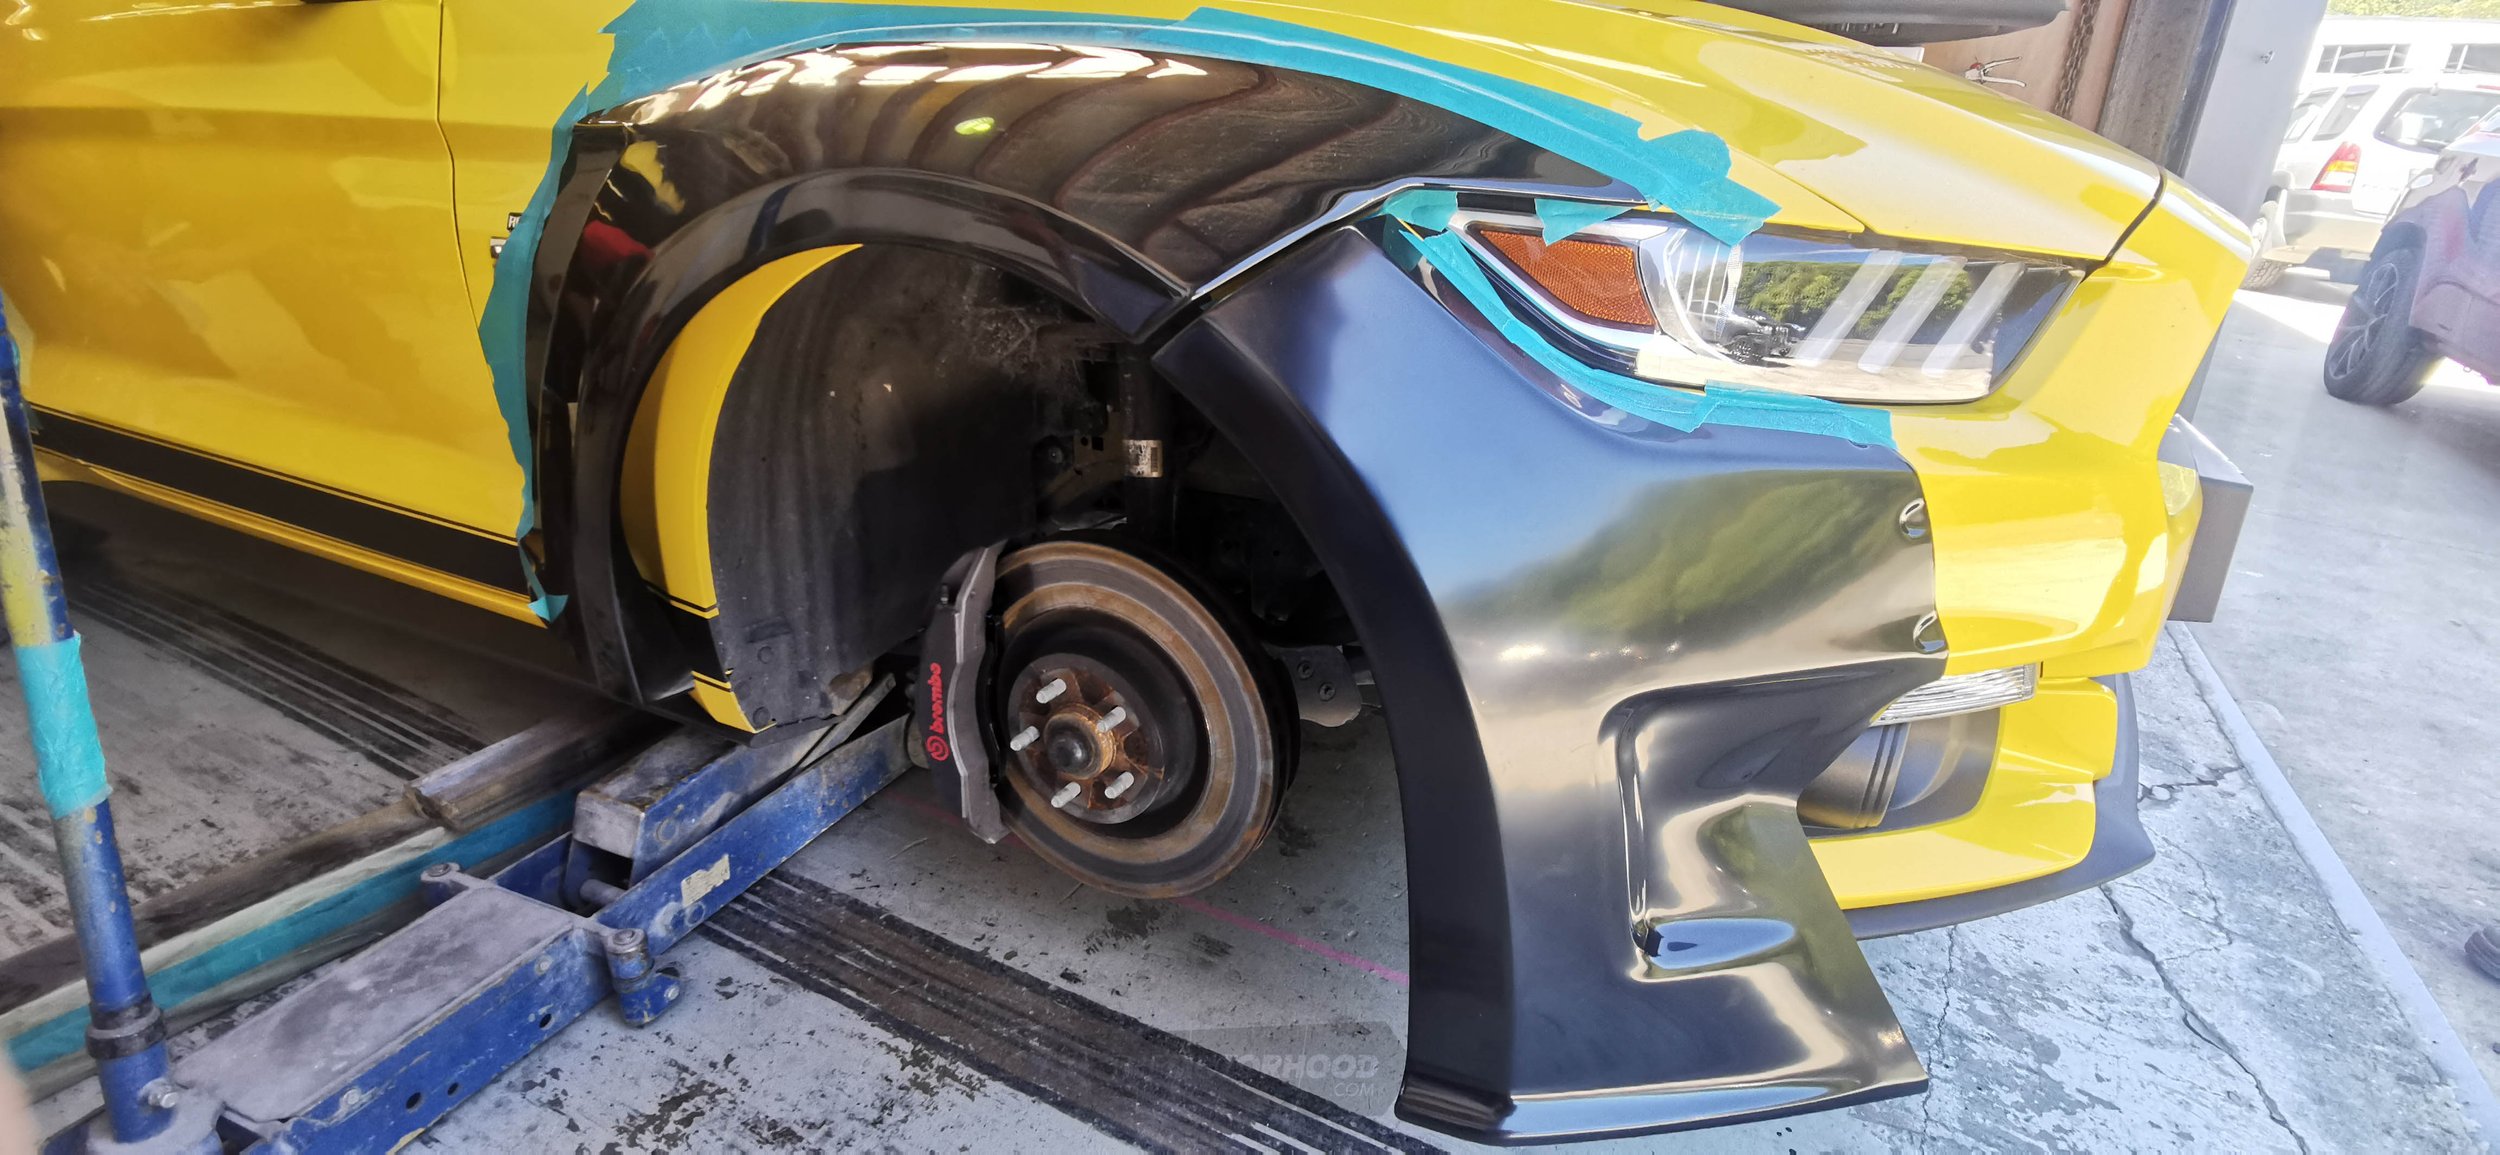
Getting the stance right is key to the project. Having a wide-body Mustang is one thing; but not having the correct wheel fitment and offset can make or break the final product. The bodykit is mocked up in place, and just taped to the car, to allow the team to measure for the wheel size that will be needed. Mag & Turbo takes control of all the calculations. A custom one-off set of BC Forged wheels is supplied — 20×11-inch up front and a chunky 20×13-inch in the rear.
The Strip-Down
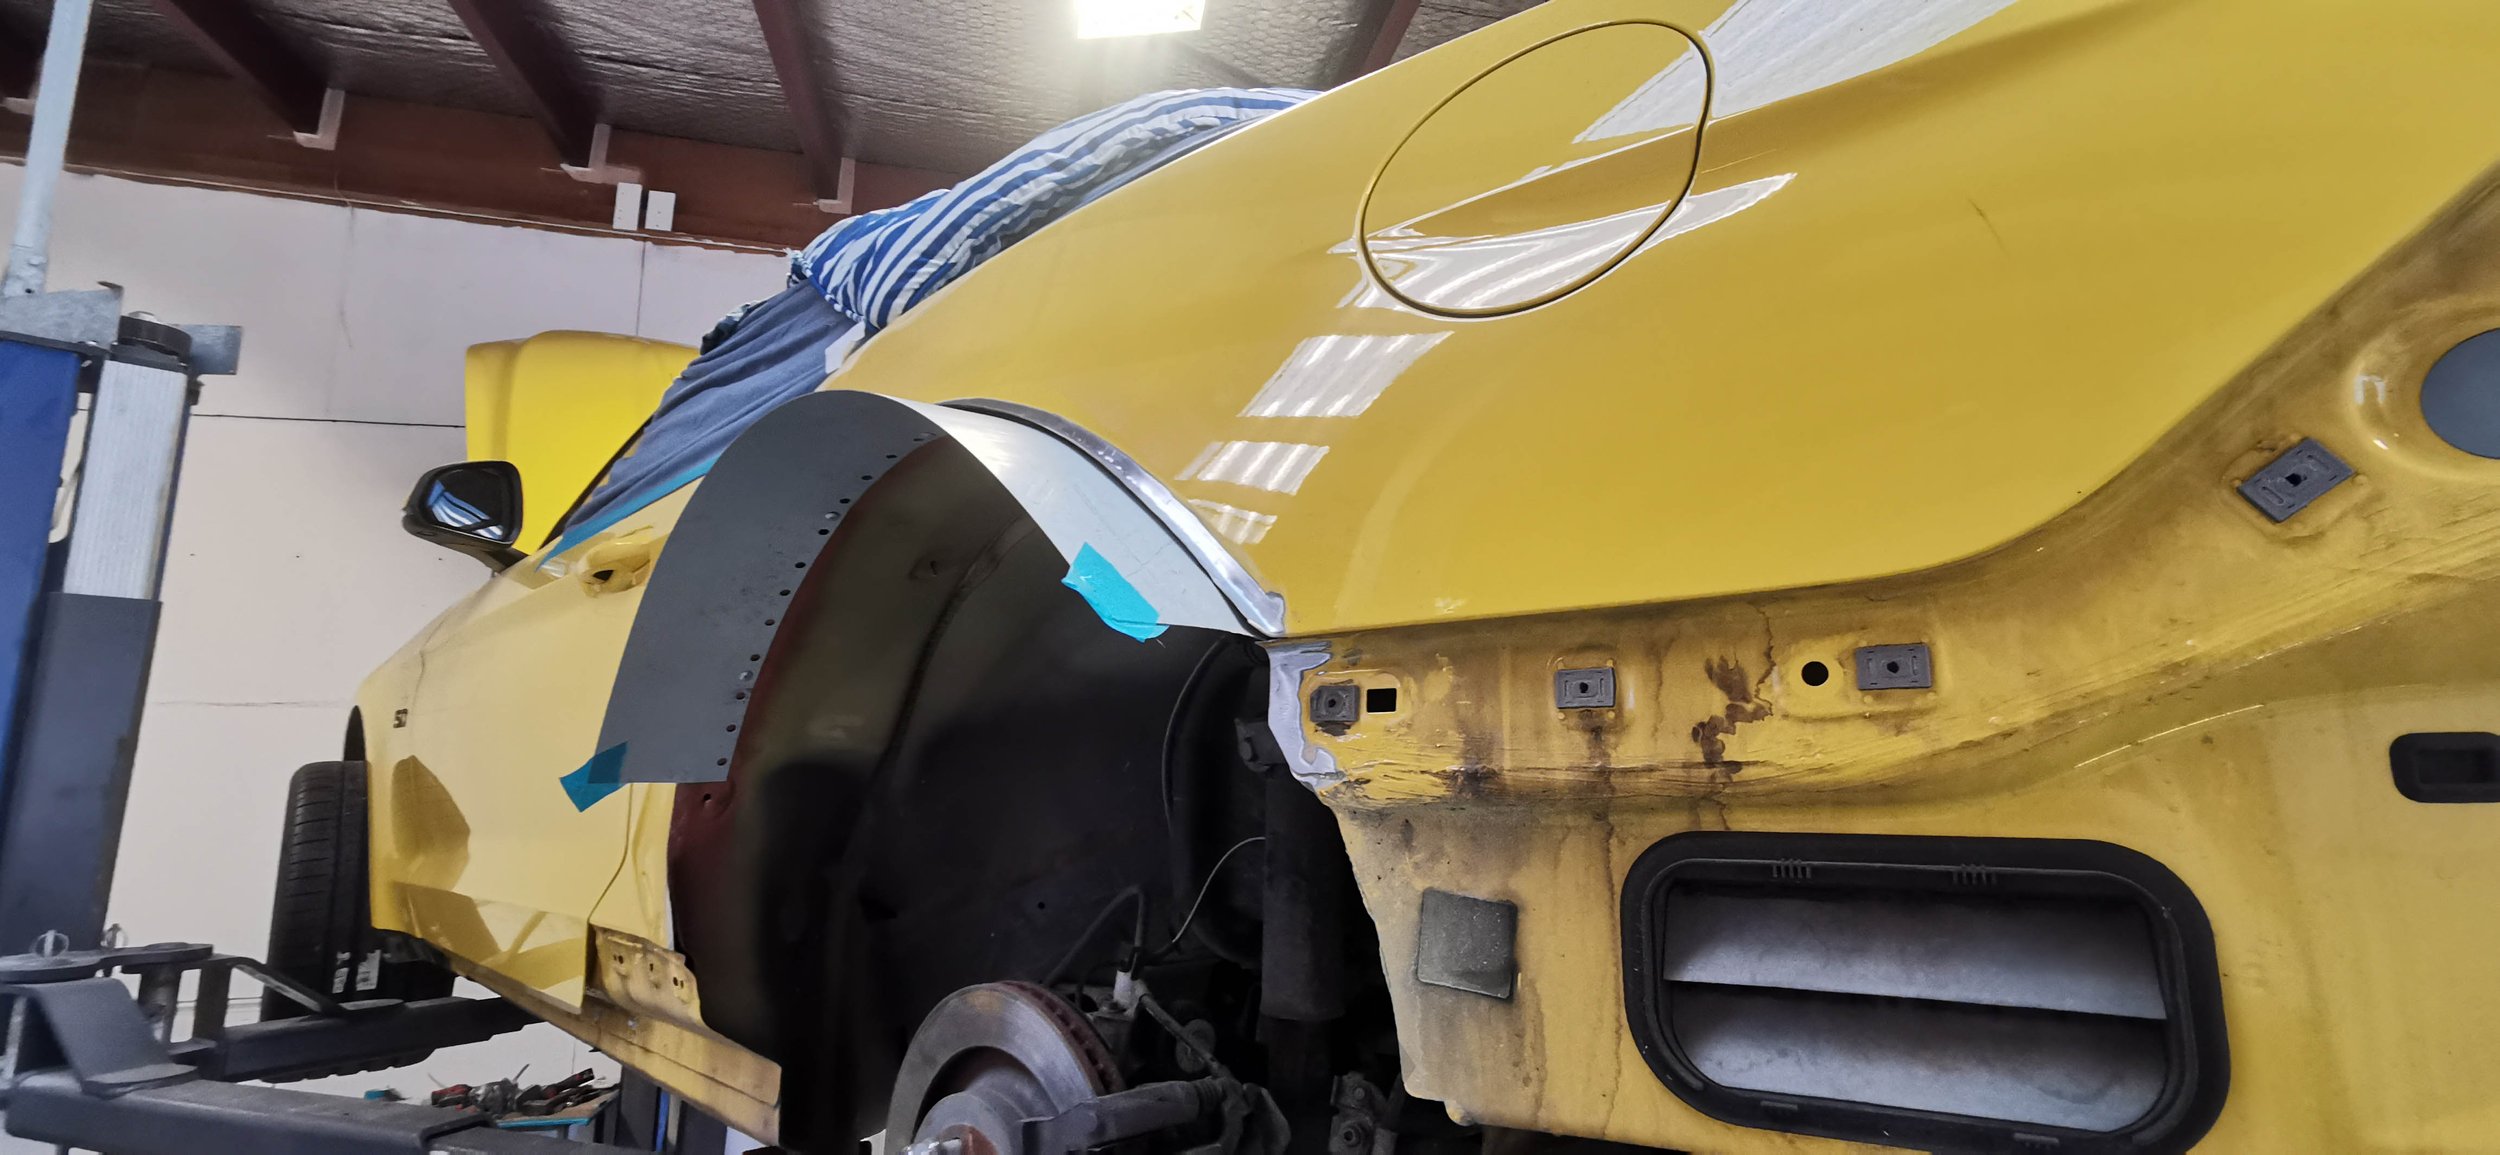
Removing all the rear interior carpet and boot liners allows access to the inner wheel arches. The inner guards are also removed — mostly to prevent any fire damage from cutting and welding — along with the front and rear bumpers.

Cleared To Fit
In some instances, wide-body kits are simply bolted to the car, with no cutting required. That’s all well and good if the wheel fitment works; in this case, it doesn’t. With Renier’s desired ride height and 13-inch-wide rear wheels, the rear guards have to be radiused around 100mm. The rear inner guards then need to be sealed again — essentially mini-tubbing the rear.
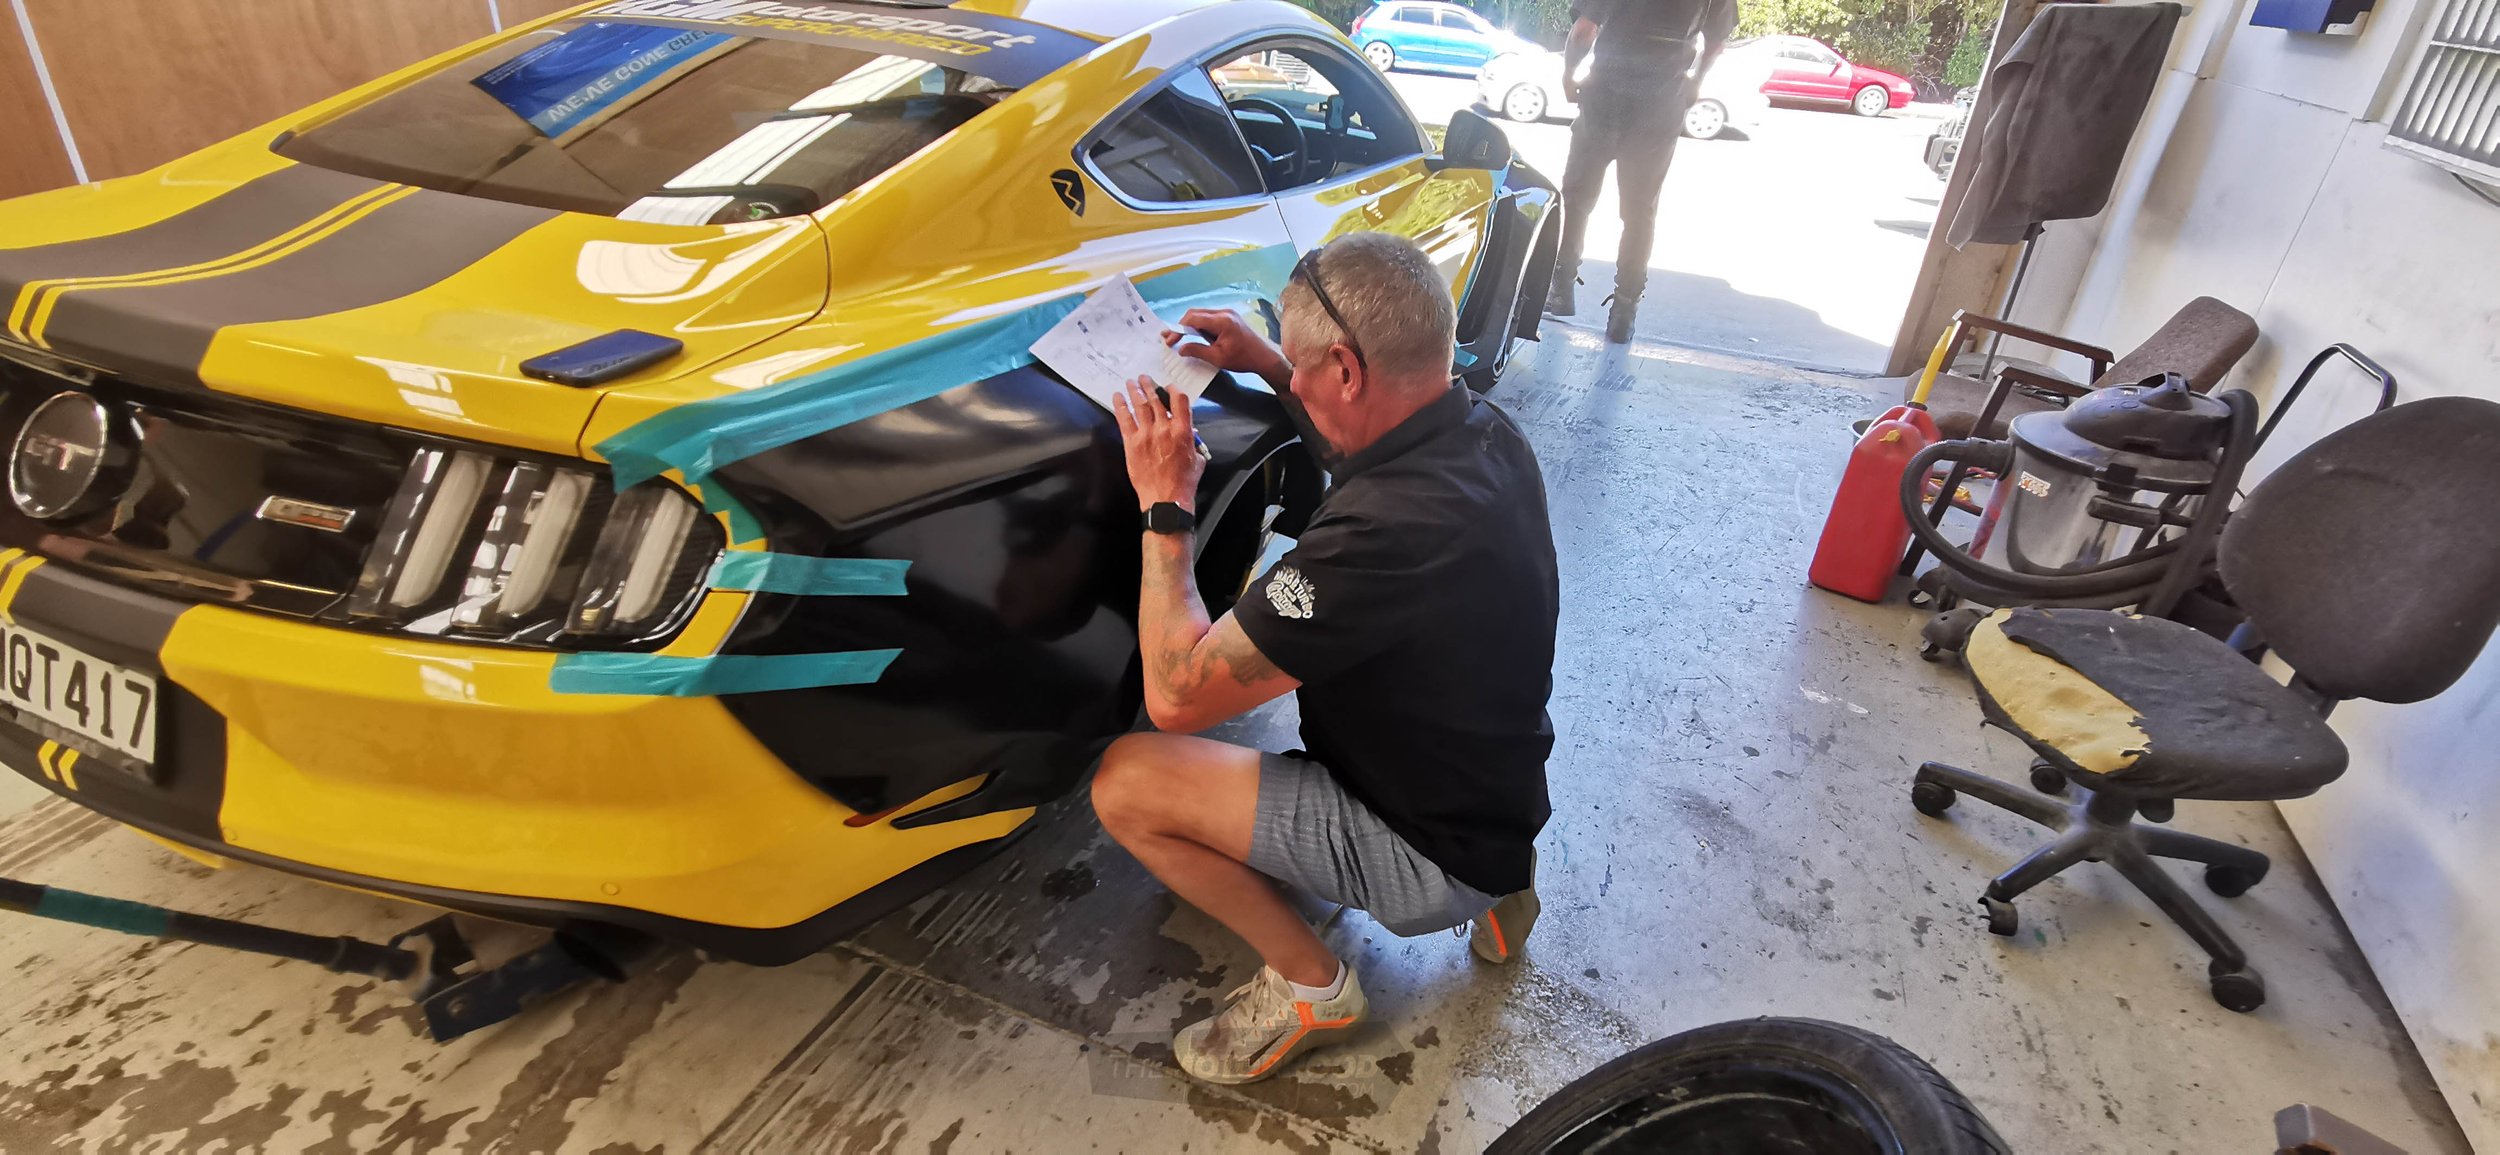
At the start of the process, the planned modifications are discussed with the certifier. His biggest concern is that the ultra-high-strength steel areas that make up the integral safety of the vehicle are not cut or modified. Ford’s Motorcraft website has all the repair specs, showing the areas built of different metals, and the welding matrix graph shows what can be welded and where; we are clear to proceed.
Customs’ Ben Martin recalls, “During the process, it is important, where possible, to weld like for like on the modifications to the rear fenders. For example, if there were 20 spot welds around the wheel arch holding the inner to the outer then that is what we would aim to replicate with the new shape of the inner apron to the outer guard skin. Multiple photos [are] taken during the process to pass on to the certifier.”
A length of sheet metal is pinched and welded to the inside sheet metal and quarter panel. A generous amount of seam sealer is applied as it has direct access to the inside of the wheel tubs.
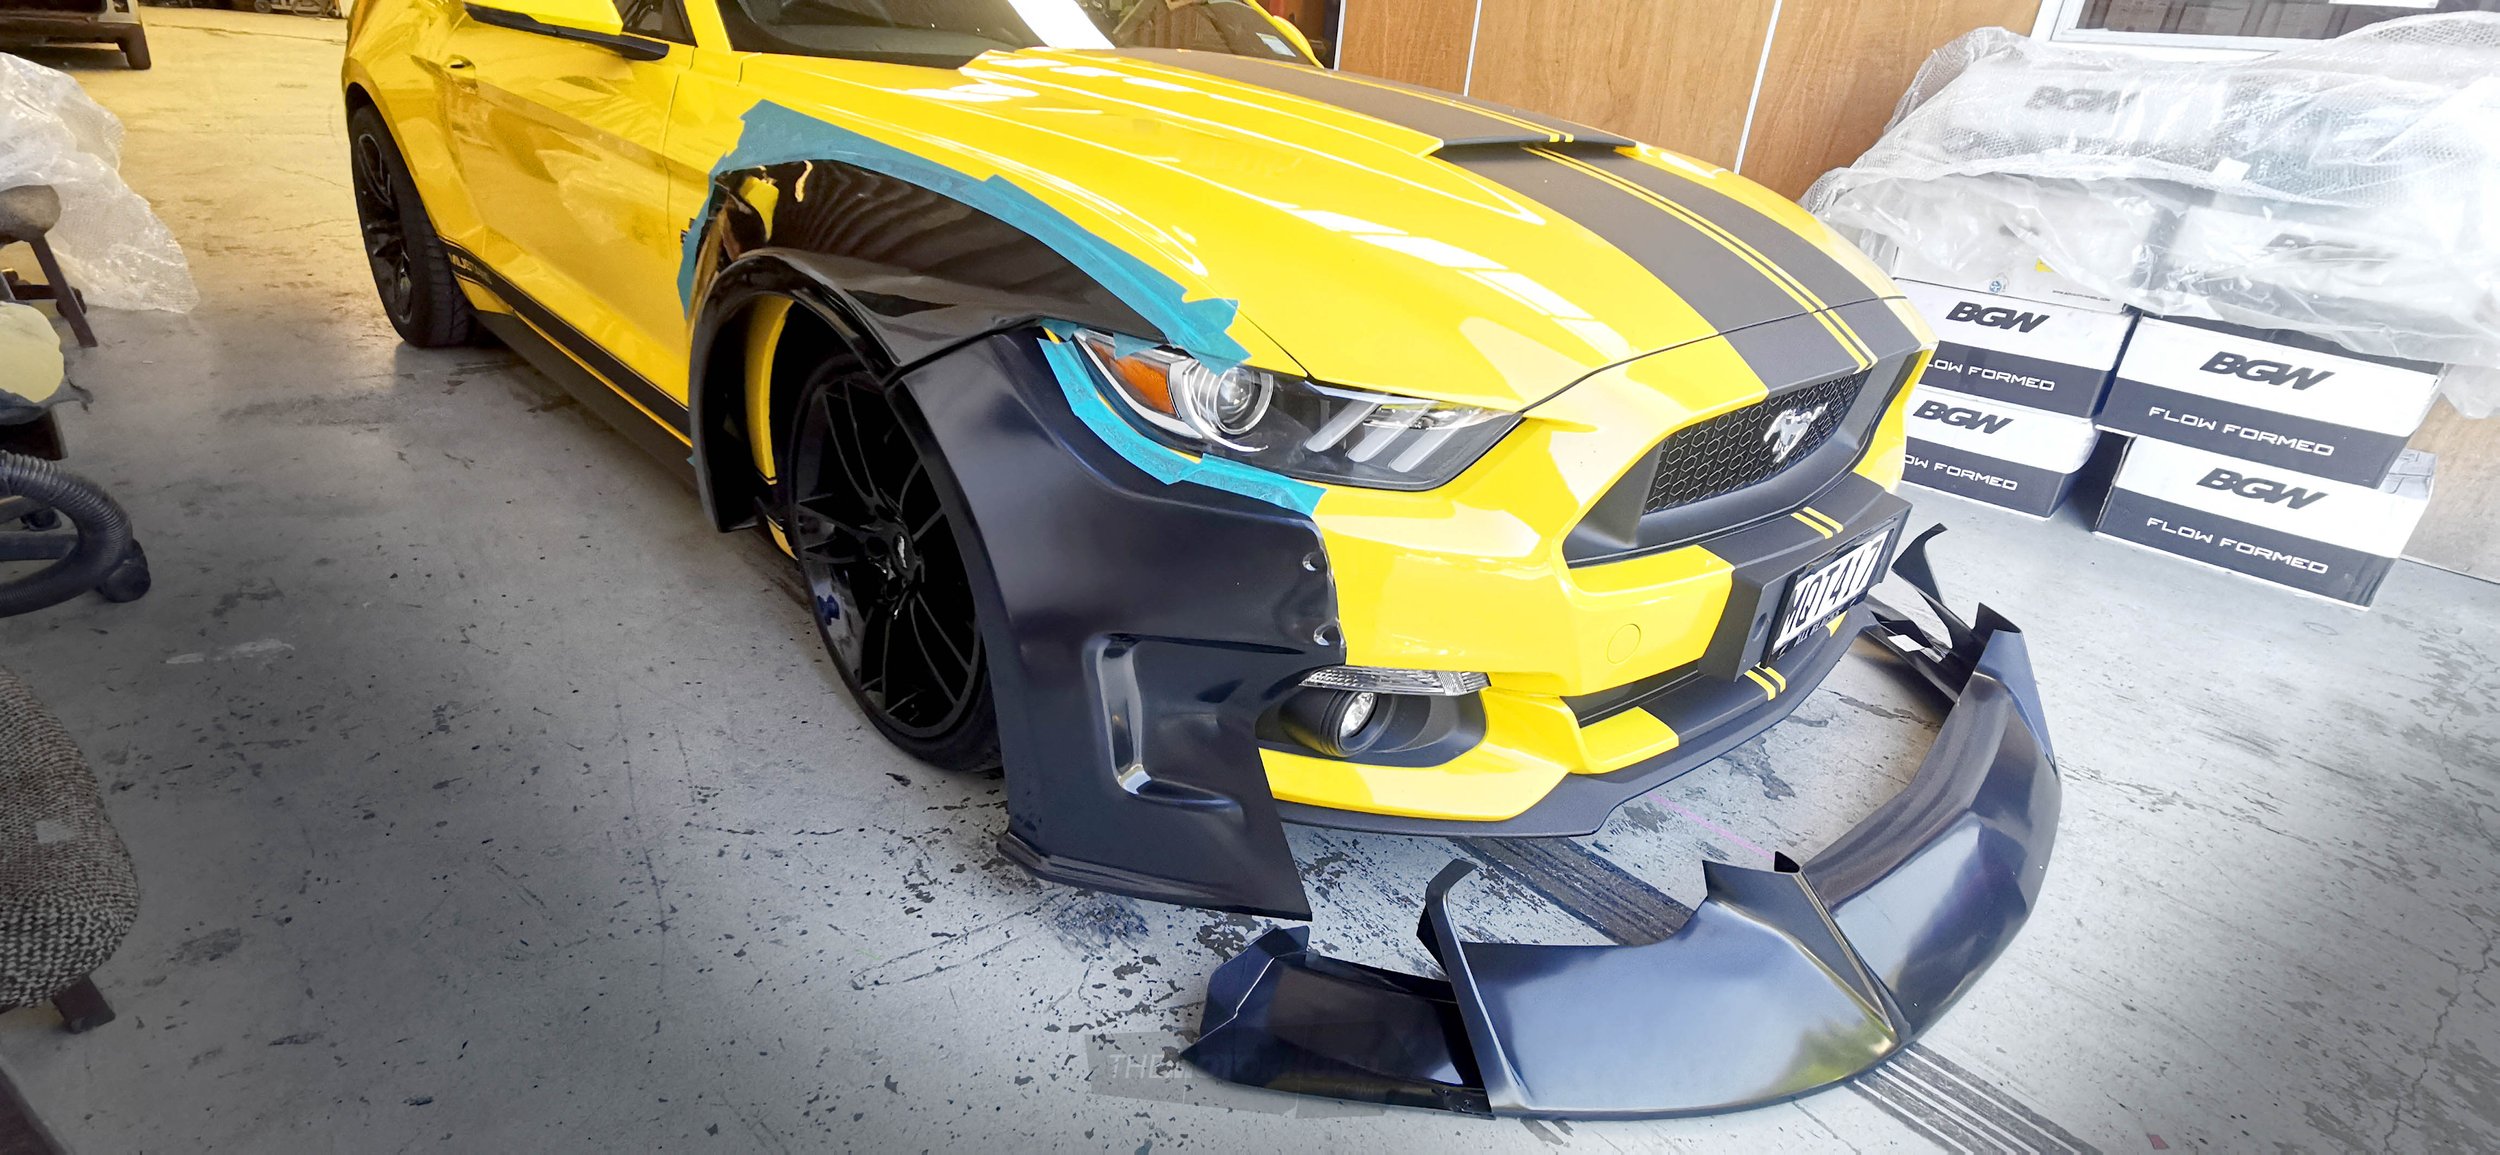
When it comes time for the front the process is similar: 100mm removed, wheel off, wheel on — repeat until everything is clearing 100 per cent. These wheels take up a big chunk of the wheelhouse and need the room for clearances, so the front and rear bumpers also need to be trimmed and capped off.

Final Attachment
Now that the sheet-metal work is completed, it is a case of actually fixing the kit to the body of the car, attaching each part using a few tek screws to secure it in place. It’s starting to take shape, and you can really see how wide this car is going to be.
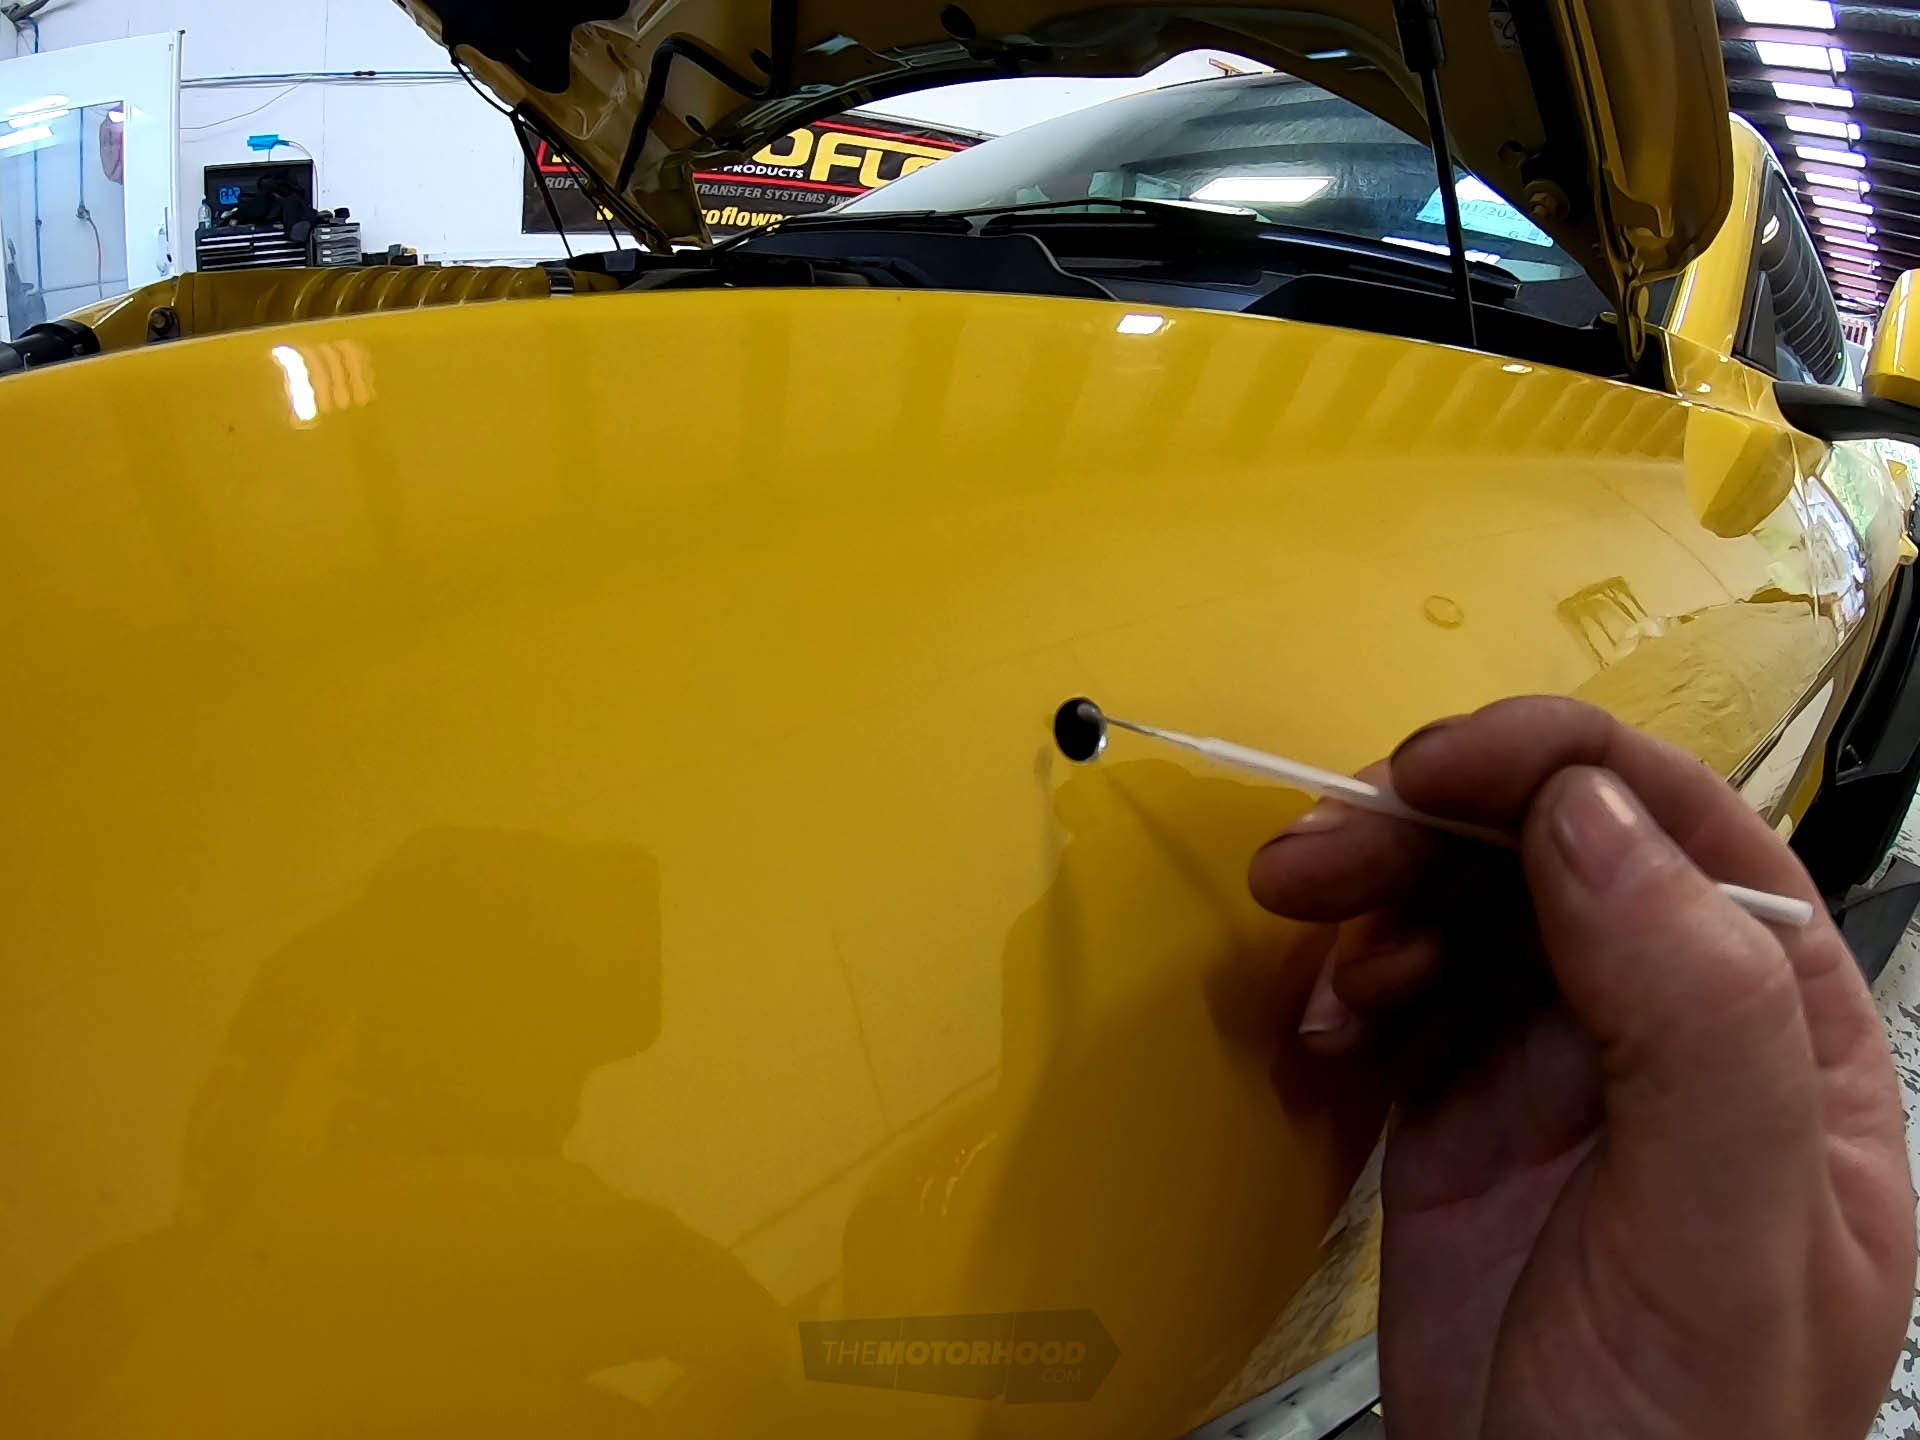
As mentioned, the kit is very well made and it doesn’t take the team long to get it all on and in place. After all the holes in the kit are drilled, it is attached using an m6 machine screw with an Allen key button head. For each hole drilled, rust prevention is effected by coating each hole with zinc epoxy primer. A zinc-coated rivnut is then inserted for the machine screw to thread into.
Extra Trim
Due to the width of the wheels, the kit needs a little trimming up front in a few places to allow for a perfect turning radius and no clipping. Some small packer plates are used between the side skirt and rear guards. Other than that, actually fitting the kit to the car is straightforward.

Test Drive
The wide-body Mustang is taken for its first test drive to see how it is going to perform. When you build a low wide-body car, in general, you have to adapt to a new set of driving techniques. With it being so low — sitting right on the limit of 100mm clearance up front — you have to watch the driveways you enter, that’s for sure. The main purpose of the test drive is to ensure there is no rubbing whatsoever.
Ben Martin explains that before the cert was issued, they had to get a WOF done on the vehicle upon completion of the job, to show a clean sheet for all items except the body modification and wheel size increase. This is so the certifier can be assured the other areas of the build are completed, and once the modifications are certified the vehicle is ready to go on the road.
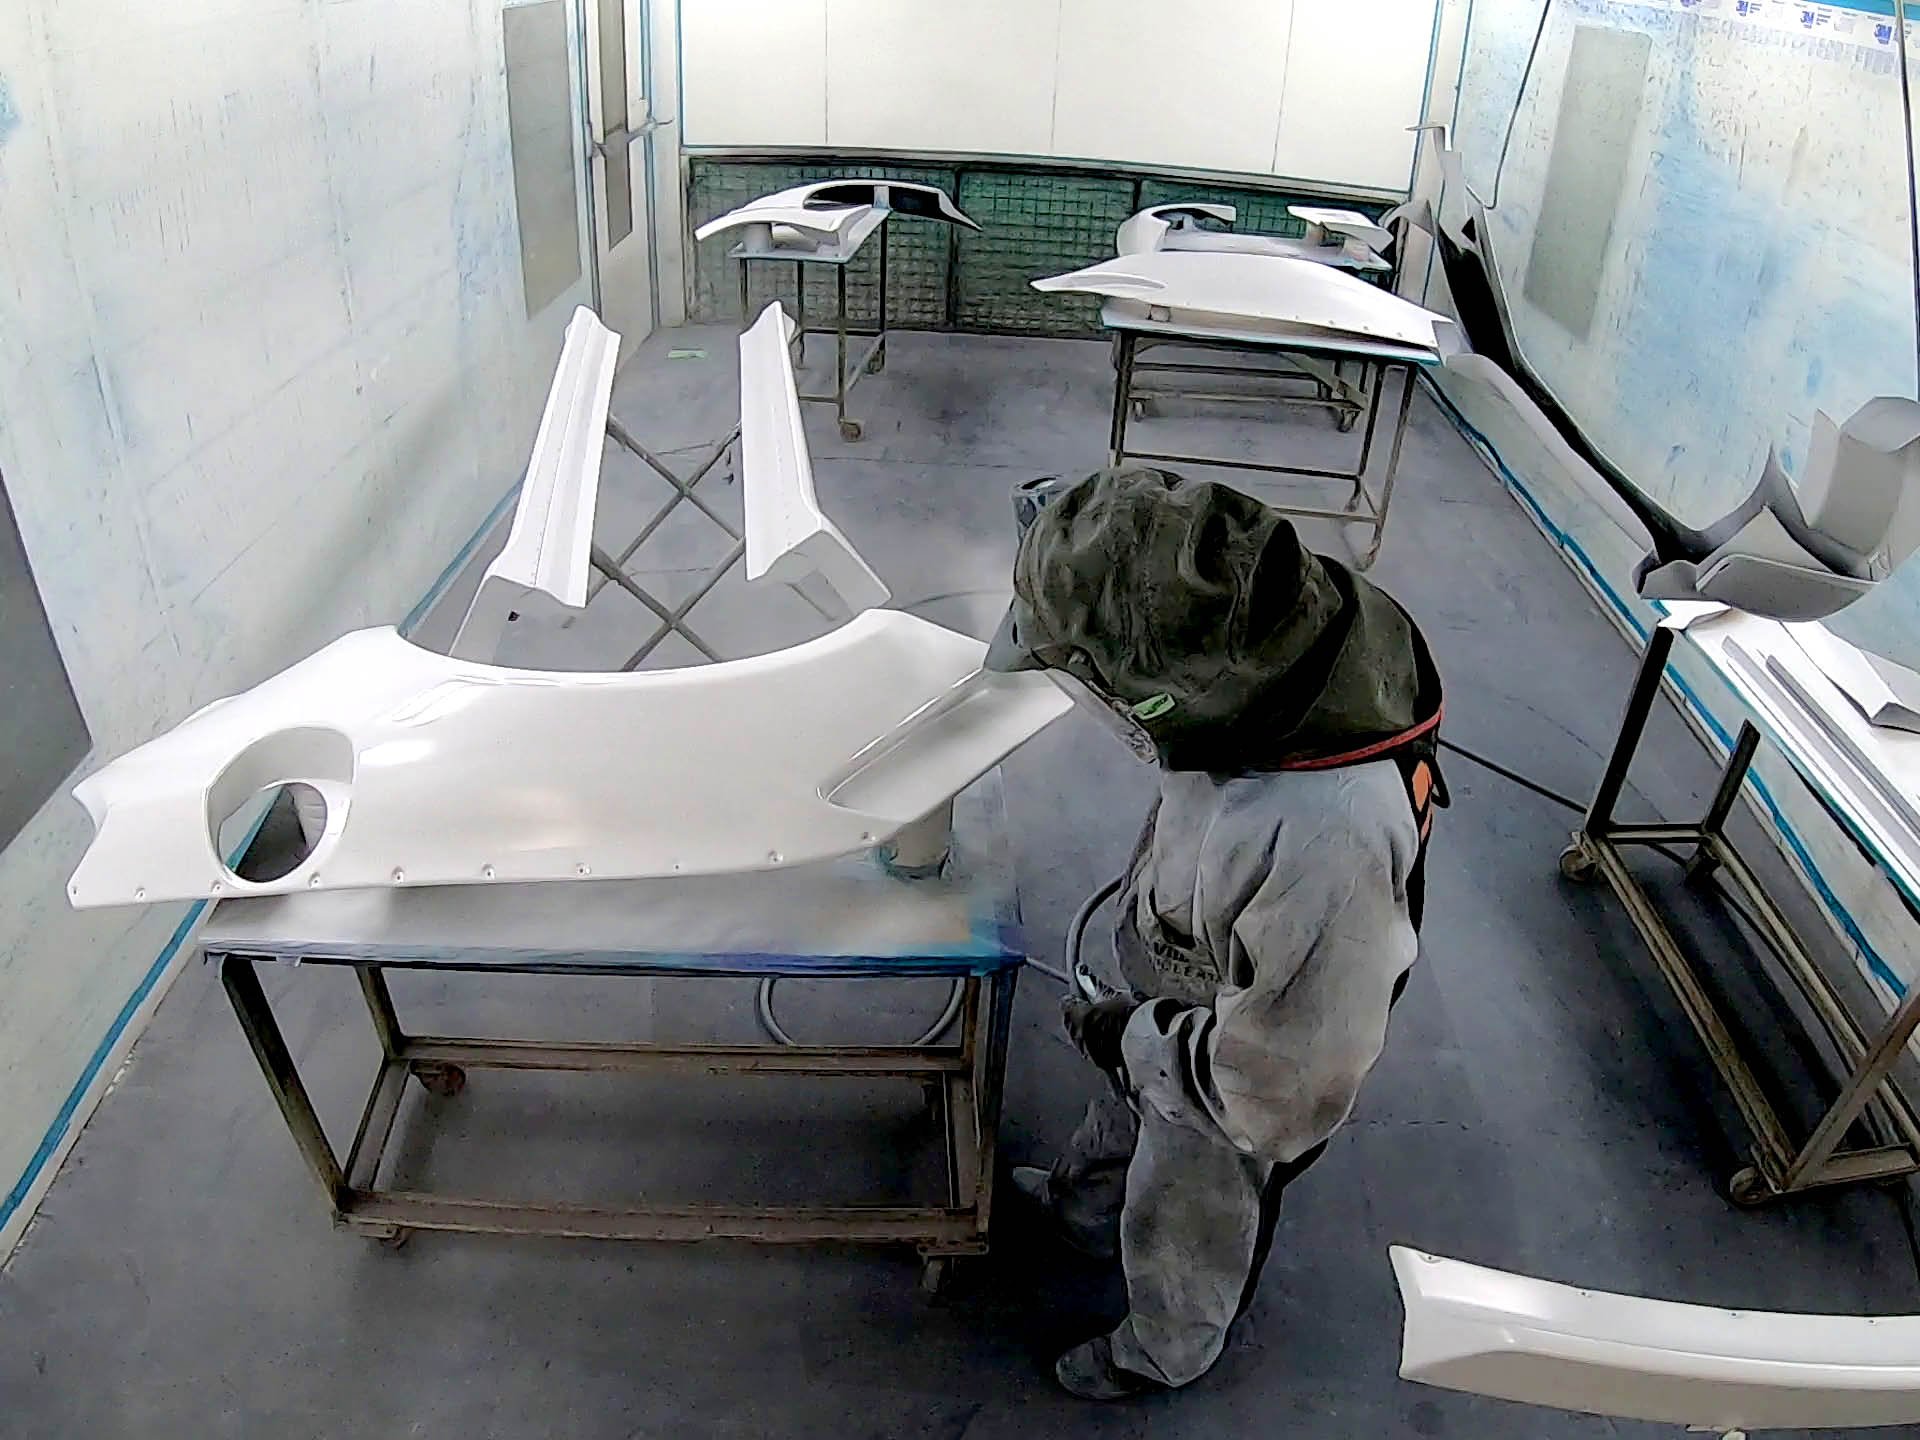
Colour Time
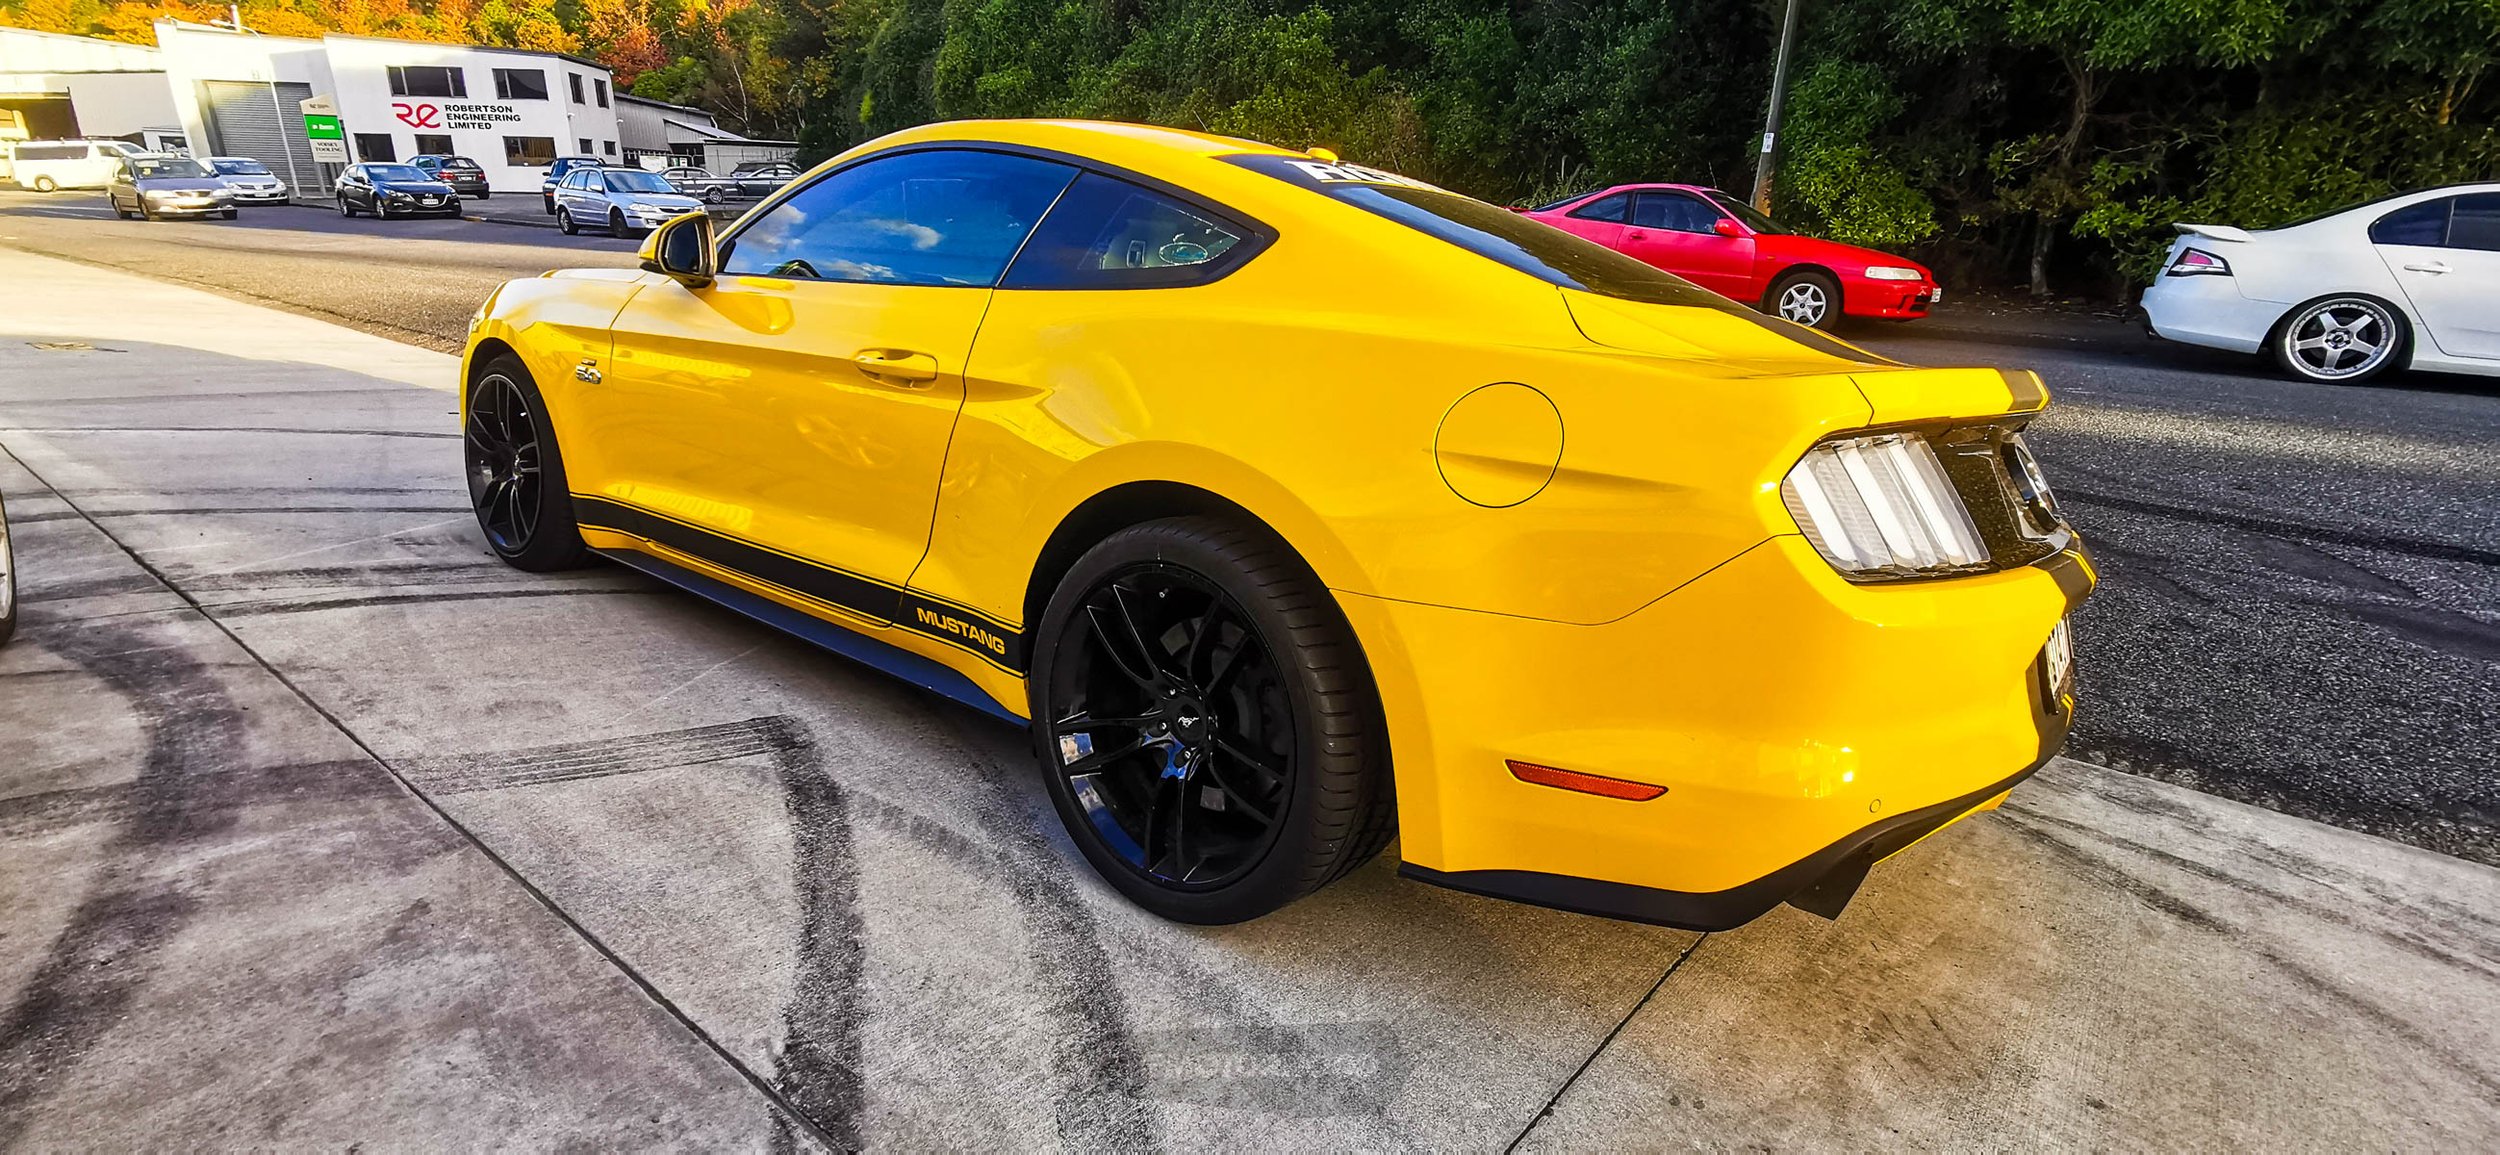
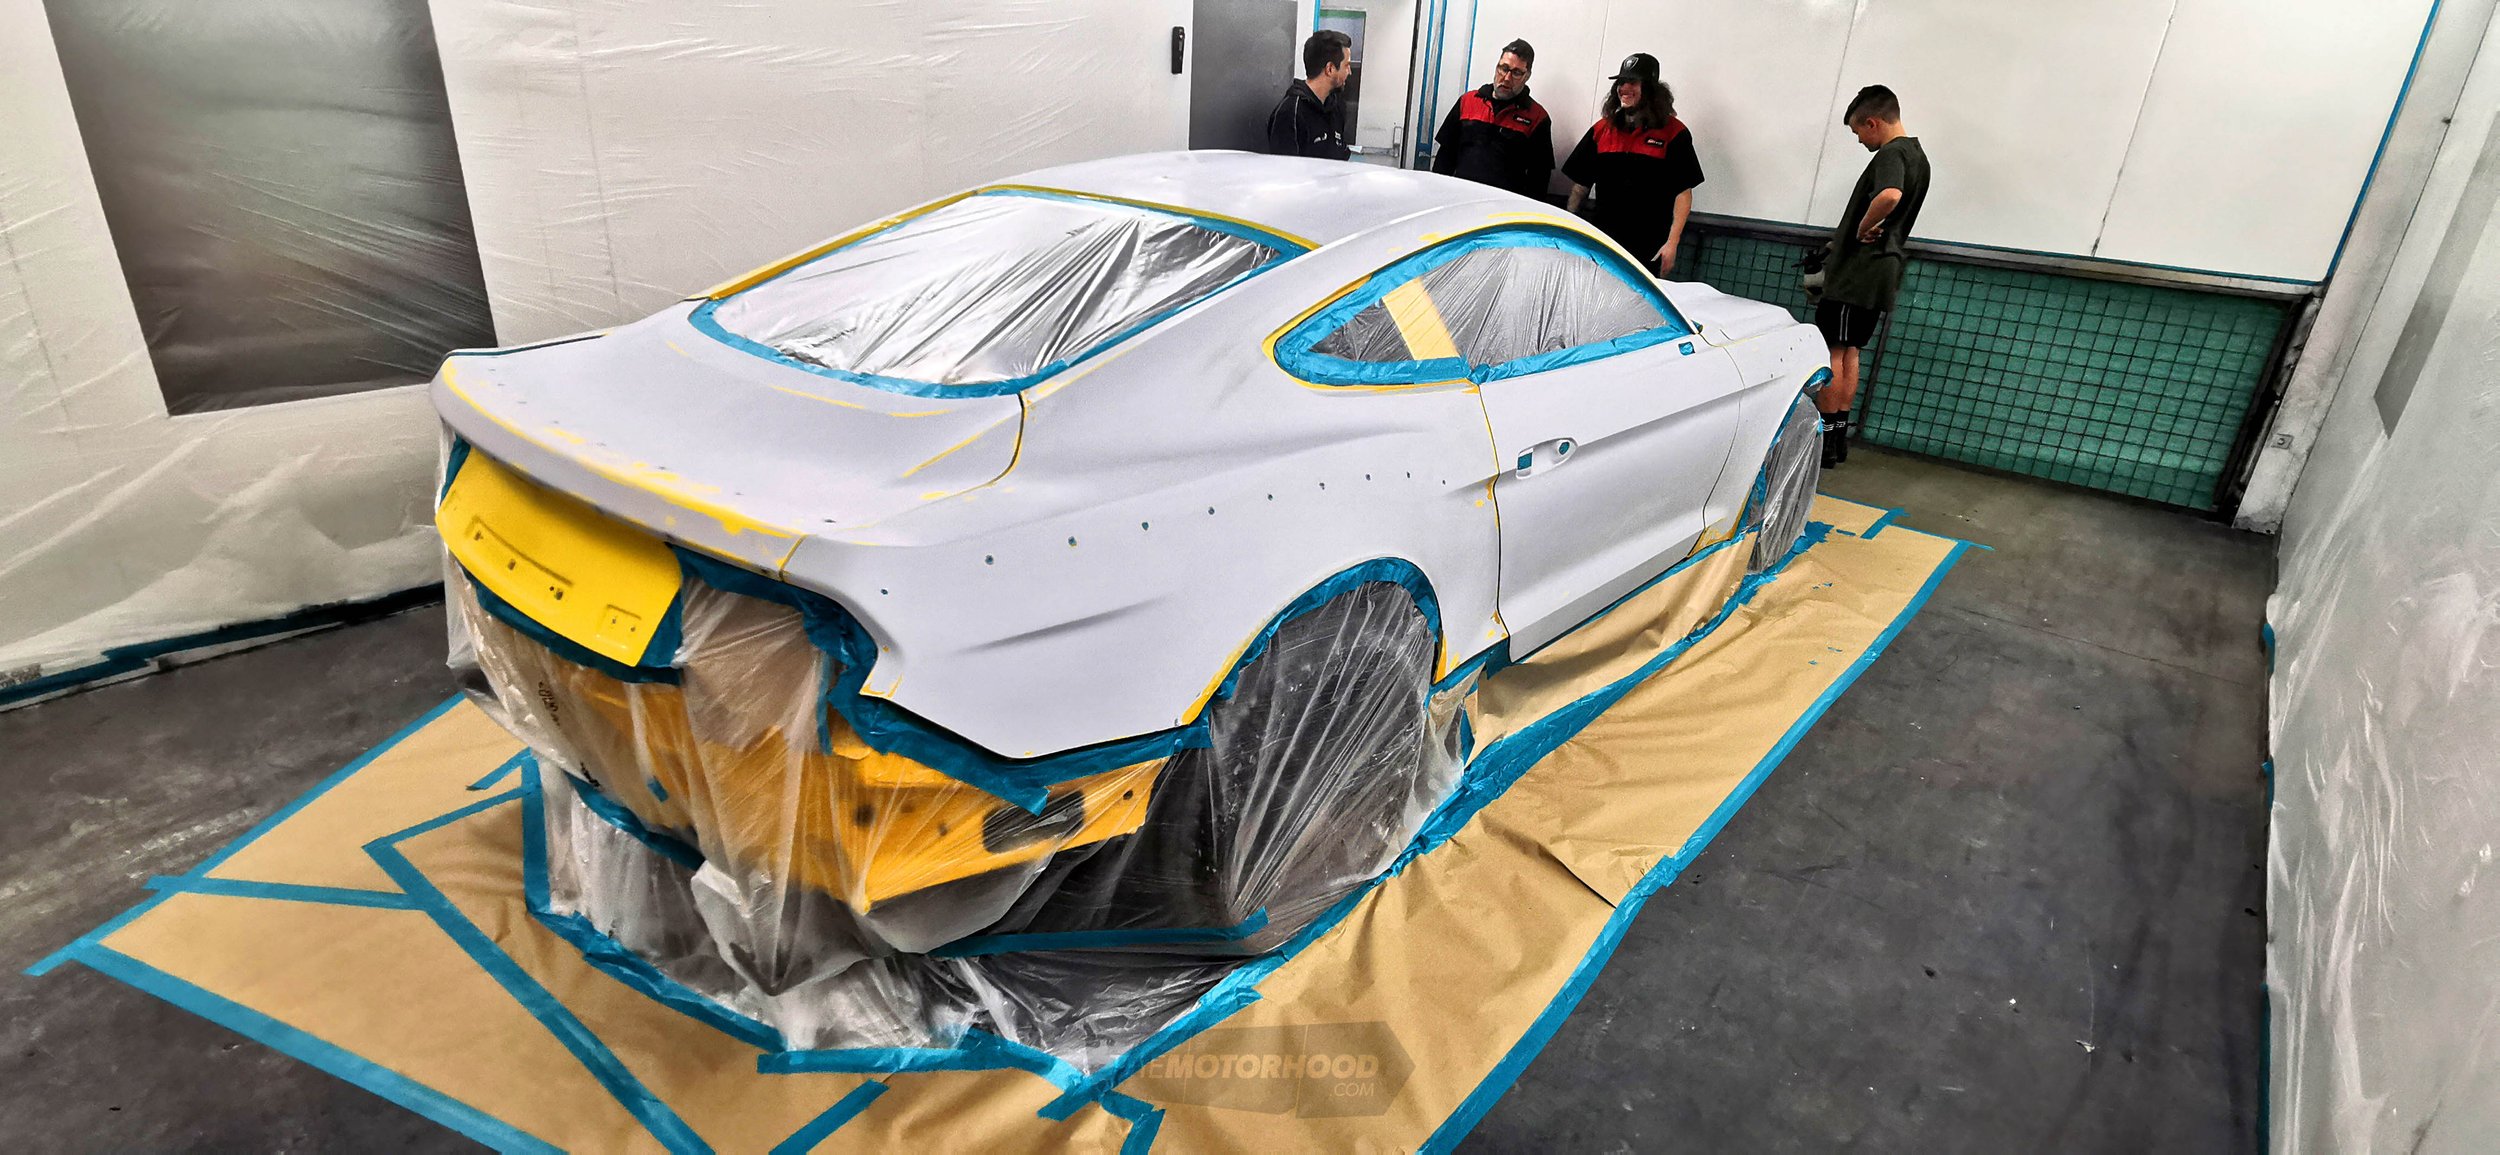
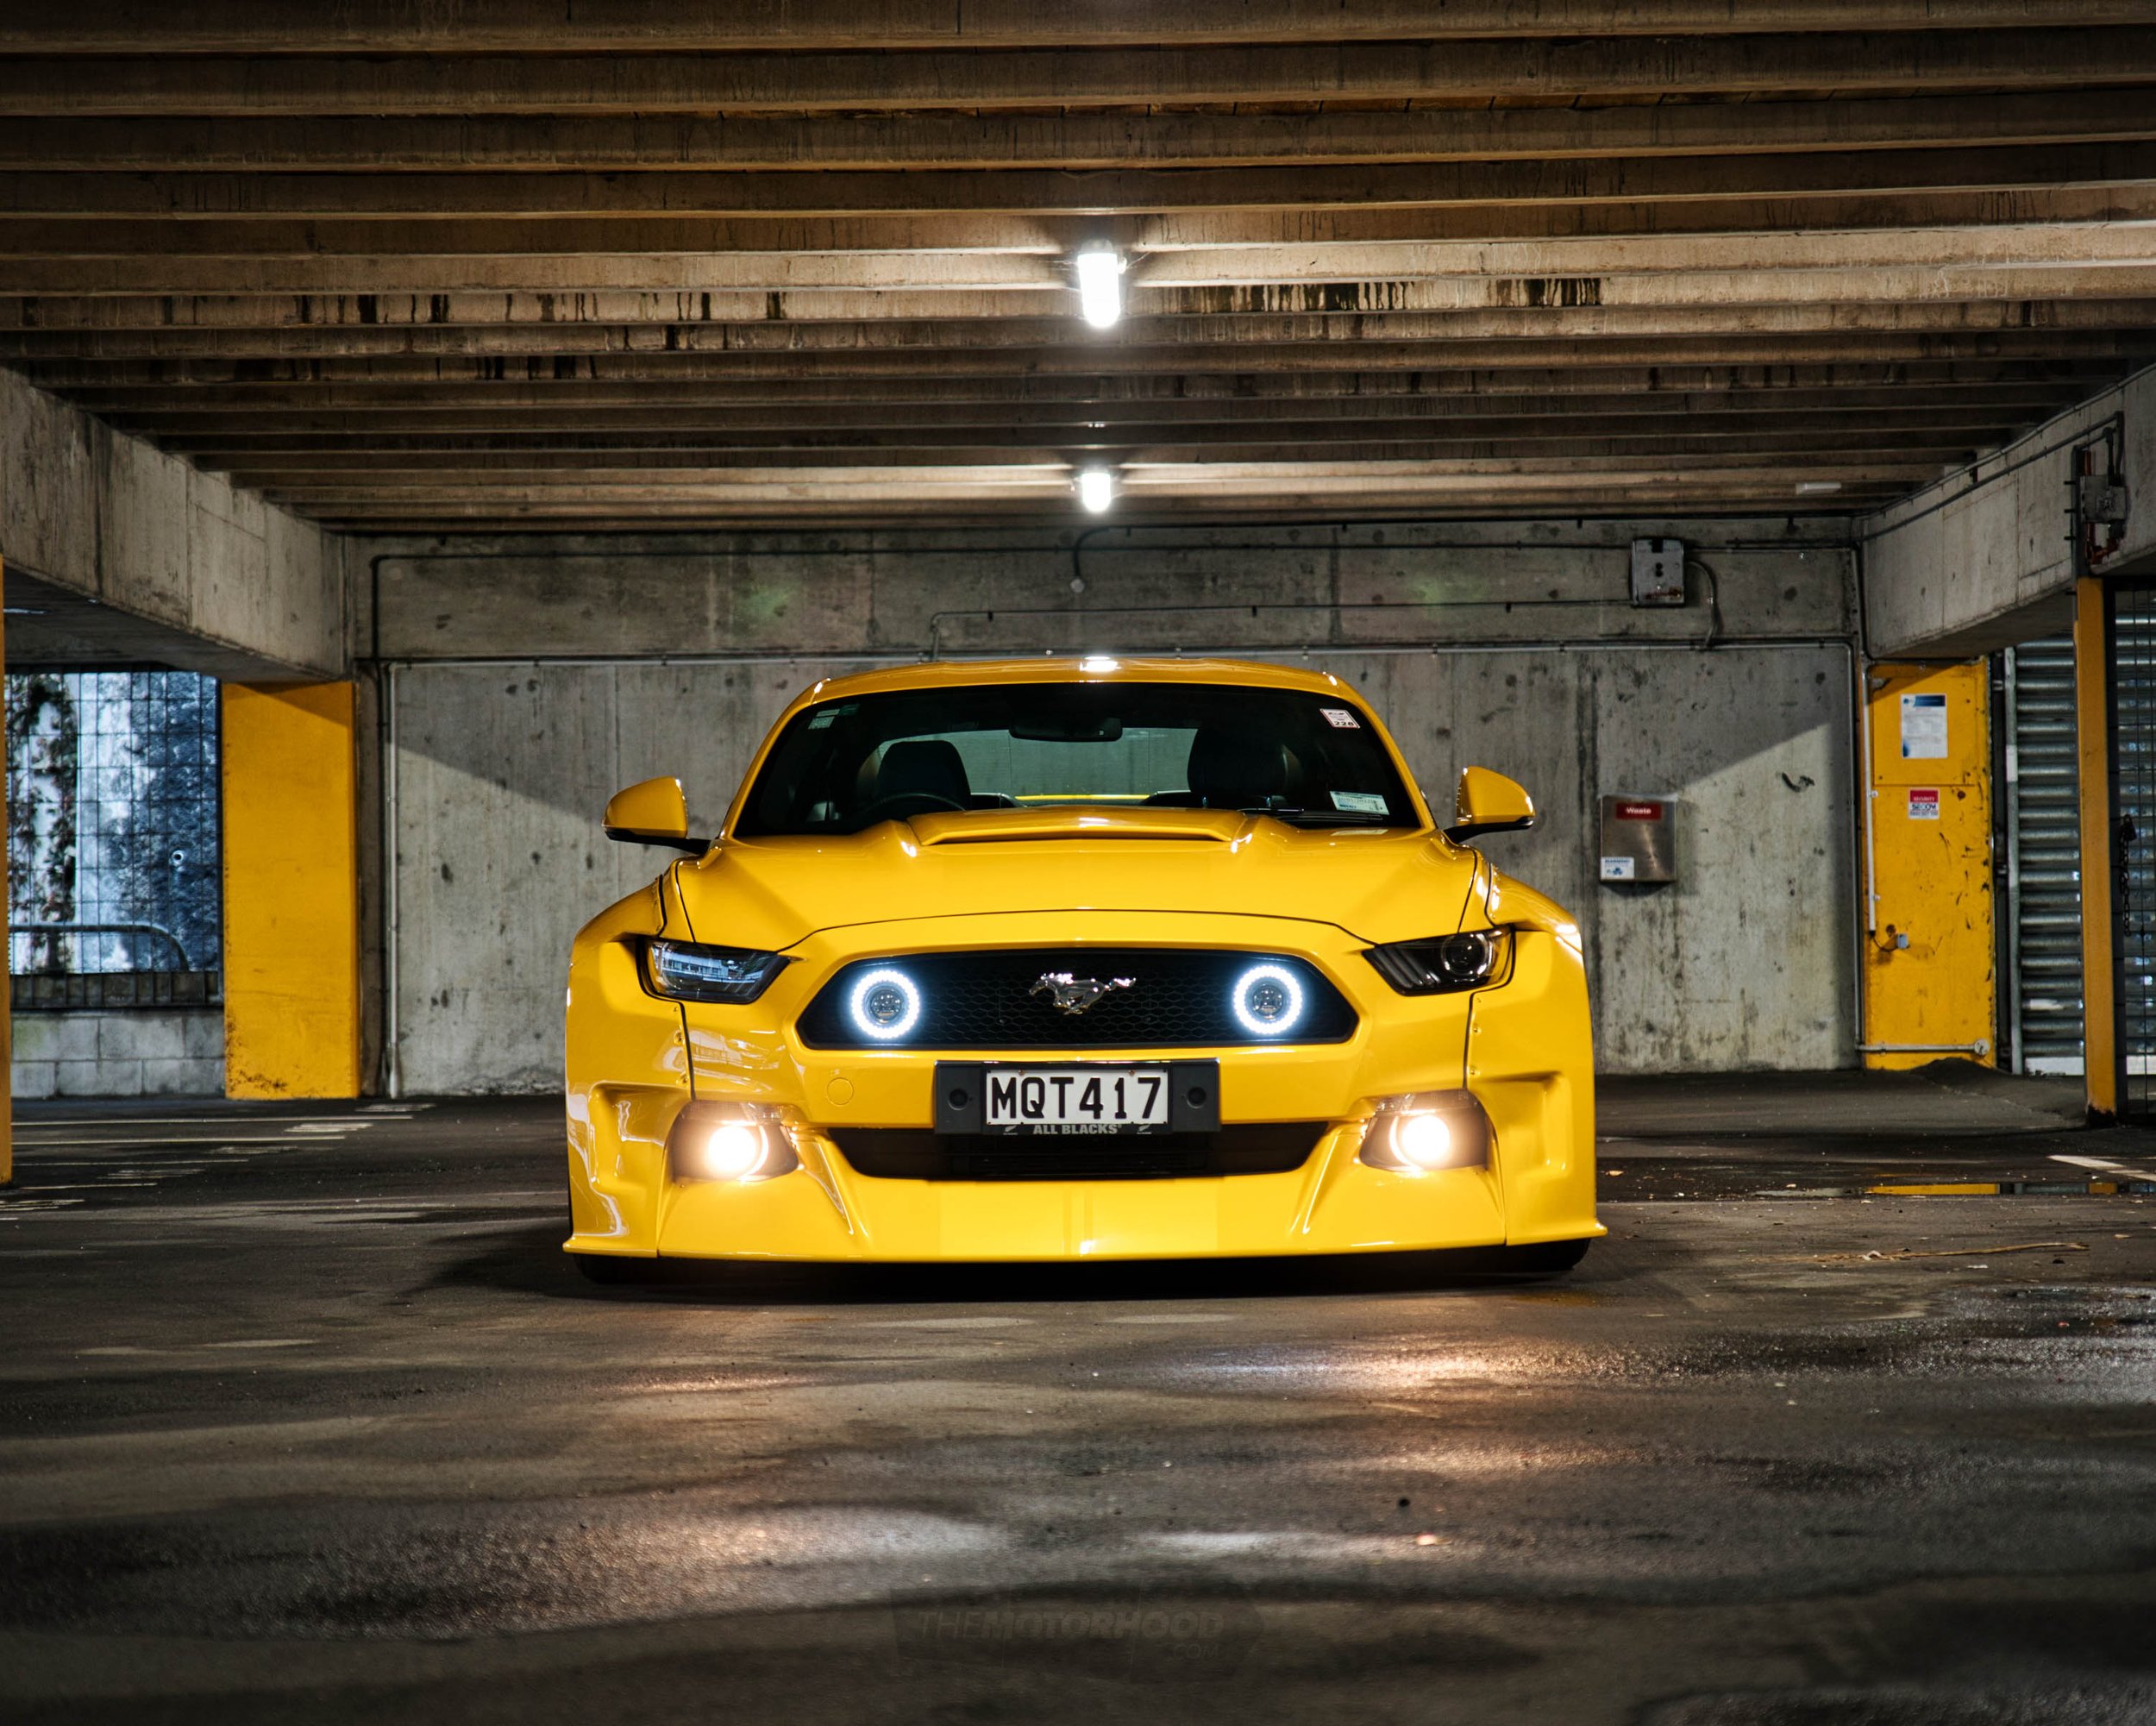
The Mustang is now stripped down in preparation for painting. The car and bodykit are sent in separately, to be painted in Ford’s Tangerine Scream, which is a three-layer pearl paint process — it absolutely pops in the sun! No Mustang is complete without its heritage racing stripes. With this one being so deep into the custom stage, white pearl stripes are used instead of the cliché black stripes, with a ghost effect making them become visible on face angles and disappear on flip angles — an elegant touch.

Completing the Look
The car is reassembled, with the bodykit fitted for its final time. Some black has been added to the bodykit inserts to give it some definition and highlight areas; this helps to break up the colour. Seeing it all come together has been rewarding for the team at Customs Body Shop, who have spent more than 120 hours transforming the vehicle from stock into an absolute stallion of a GT Mustang.
This article originally appeared in NZV8 issue No. 201