data-animation-override>
“Ever wondered how the pros would tackle the task of building a seriously cool custom hood scoop? Bodymods’ Paul Duff explains.”
Words and photos: Paul Duff
The customer’s question to us went something like this: “Can you reproduce this fibreglass bonnet scoop in metal and weld it to an original bonnet skin with no overlap joins so it looks factory both inside and out?”
Bodymods’ reply: “Sure we can.”
Customer: “Great! While you’re at it, can you delete the front bonnet moulding and the raised section through the centre of the bonnet to a factory finish?”
Again, the reply was: “Of course we can.”
In saying that, what the customer was asking was no small task once it was broken down, but, never ones to shy away from tricky jobs, we jumped at the chance to give it a go, and here’s how it was done.
Planning
Our starting point is a new aftermarket bonnet, so the first step is to swing it in the hole to check the fit. Sadly, it isn’t great, which adds a small amount of work to the overall process. Of course, it is nothing that can’t be fixed with a bit of time.
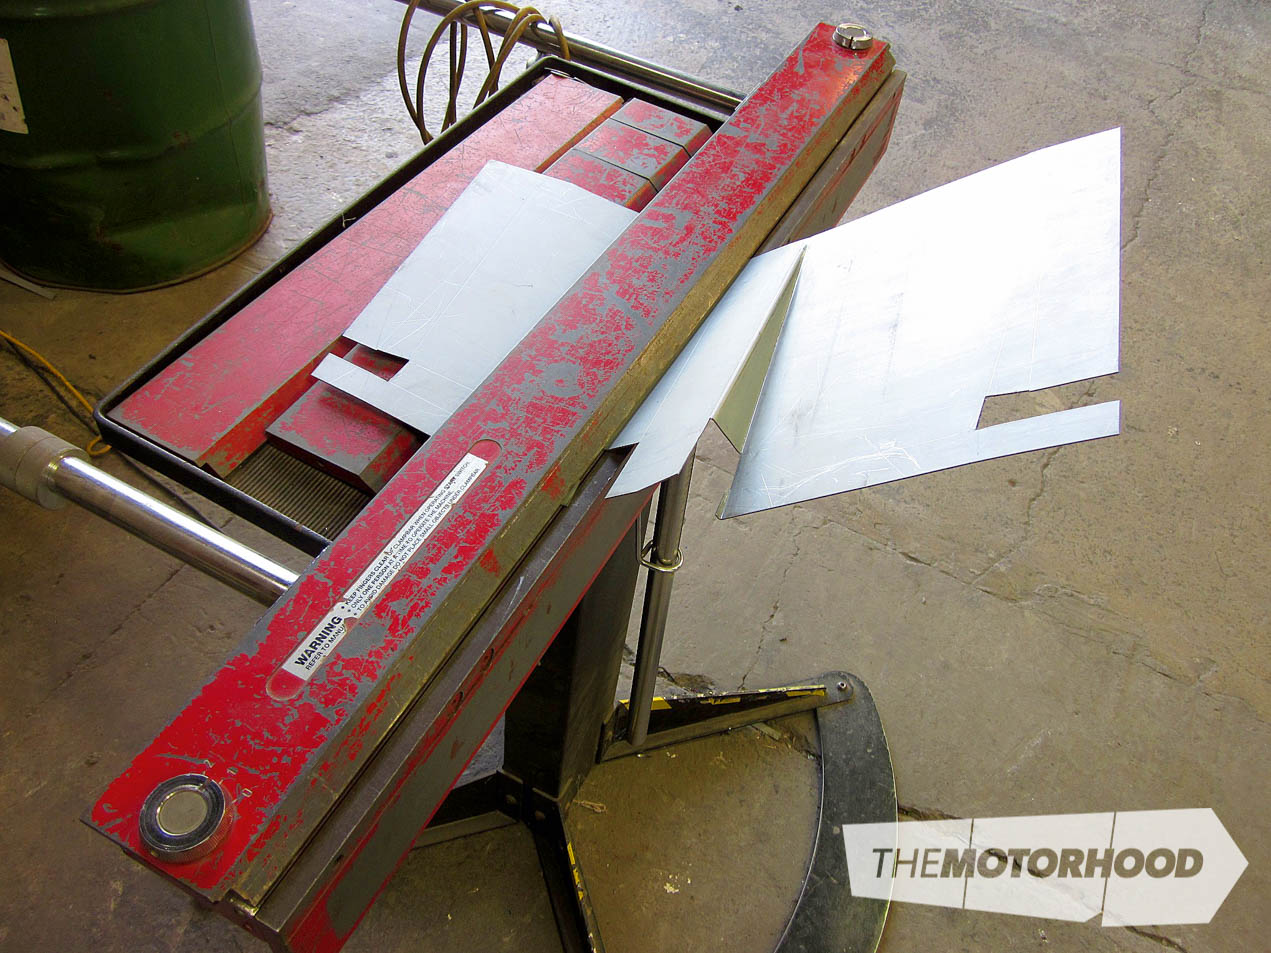
The next step is something we refer to as ‘mapping’, which is simply creating reference points to measure from. In this case, we use masking tape to highlight shape and define lines. Note how we lay out only one side — as this part is symmetrical, there’s no need to map both sides. We simply flip our measurements off a centre line to establish left and right. This is a great time saver; thinking smart is crucial to making jobs of this type achievable.
Design
Next is to decide how many pieces of metal to make the scoop from. One piece? Don’t kid yourself; most parts can be made from one piece of material, but sometimes this can mean a bigger labour content or even compromises in the strength of the finished part. That’s not thinking smart.
Two pieces? Yes, completely achievable once you’ve put together a plan for a manufacturing process. This can mean some quick throwaway mock-ups of folds and radiuses, and so on, to confirm that your plan is a good one. At this point we’re about four hours in and haven’t yet started making the actual part. The advantage with this type of preparation is that at the end of the job there should be no sad stories sitting at the bottom of the rubbish bin. Nobody pays for those, so we all lose!
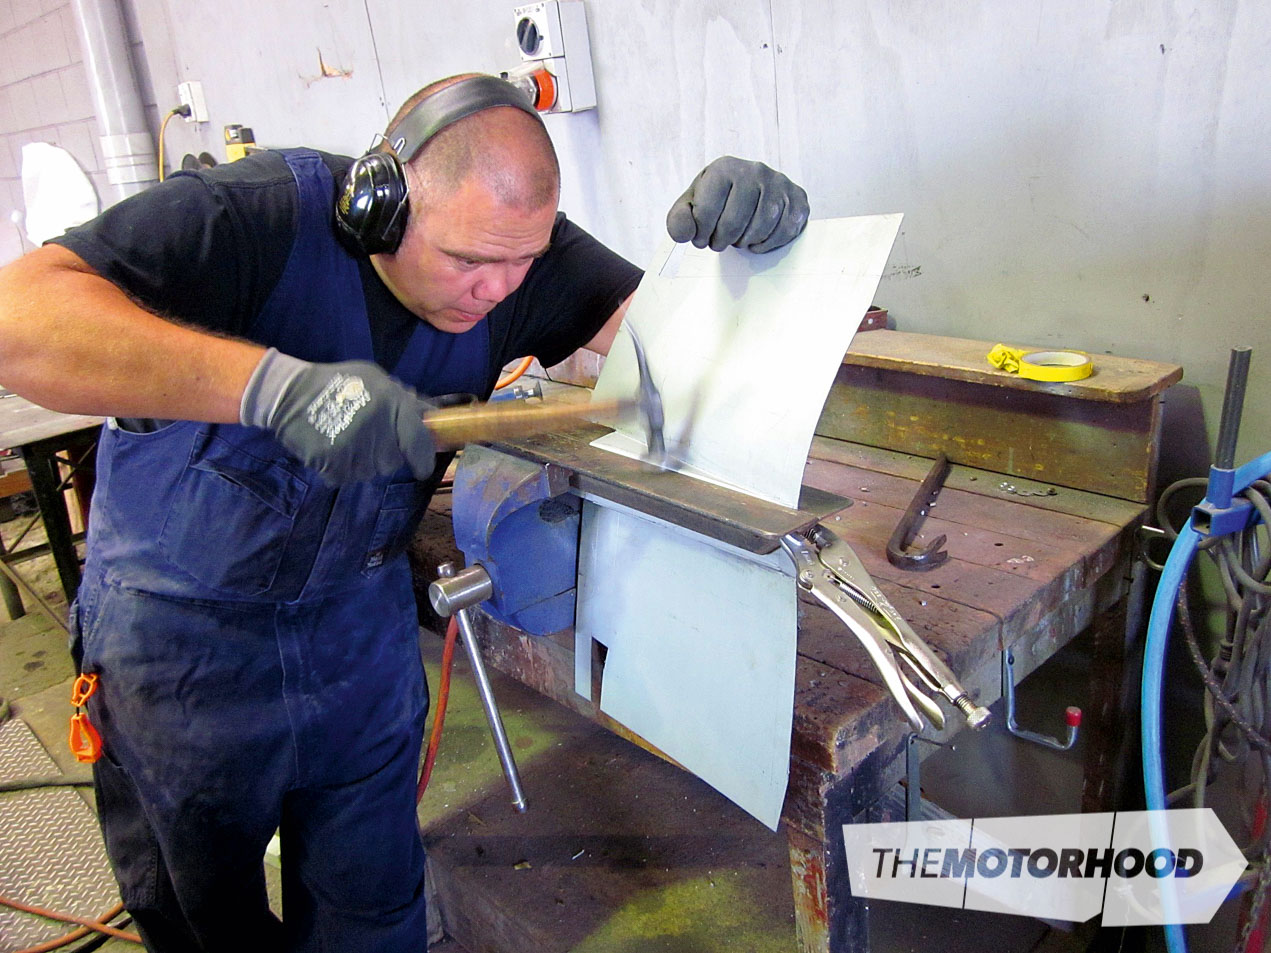
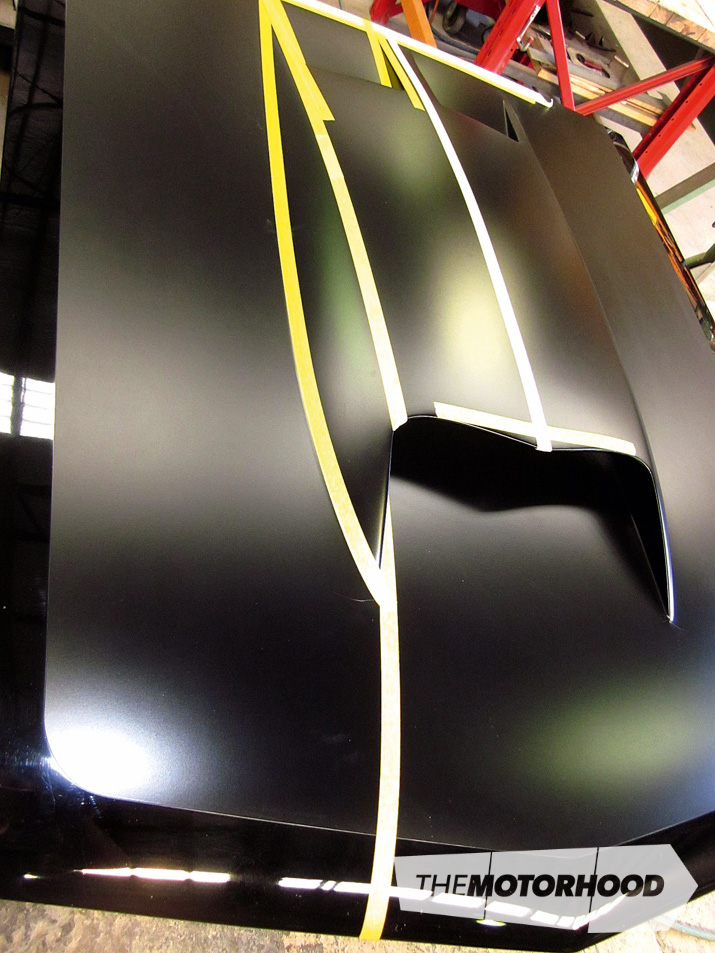
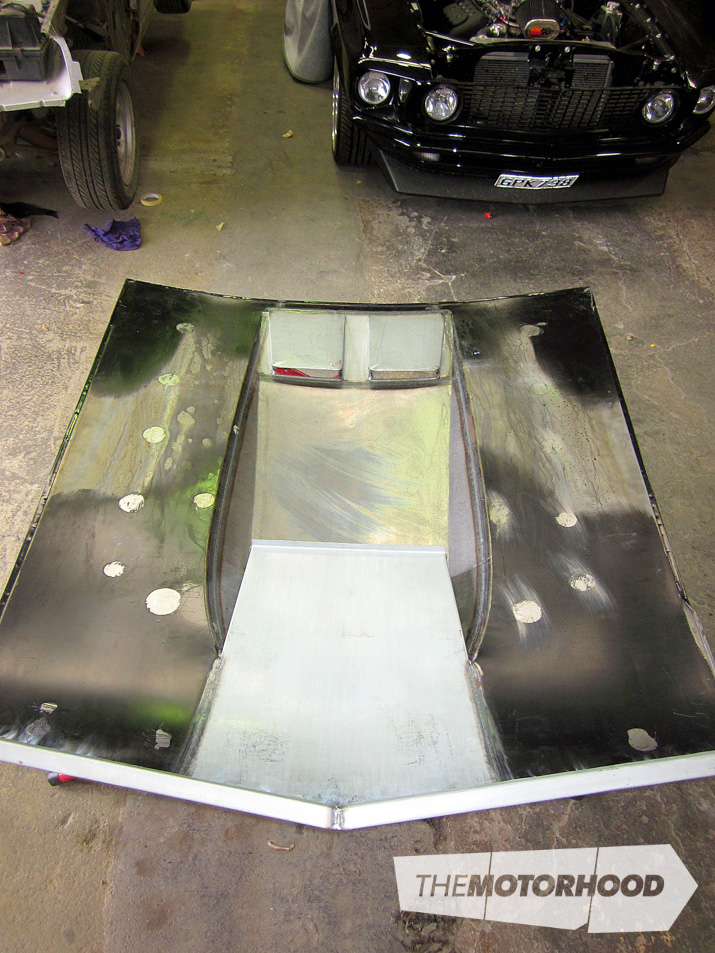
Rear section: a nice little brain-teaser, with angles, tapering flat sections, and cut-outs. These are achieved first in the Magnabend folder and finished by hand. We find it easier to fabricate the part first, then cut the holes. We then create the minimal radius in the top edge, using the English wheel. It’s also common to make these parts slightly over size and cut them down to finish.
Pro tip: We choose to use uncoated mild steel when creating parts requiring a reasonable amount of shrinking and stretching. The rest of the time we use zinc-coated panel steel, as, in addition to the obvious coated advantage, we find it more robust.
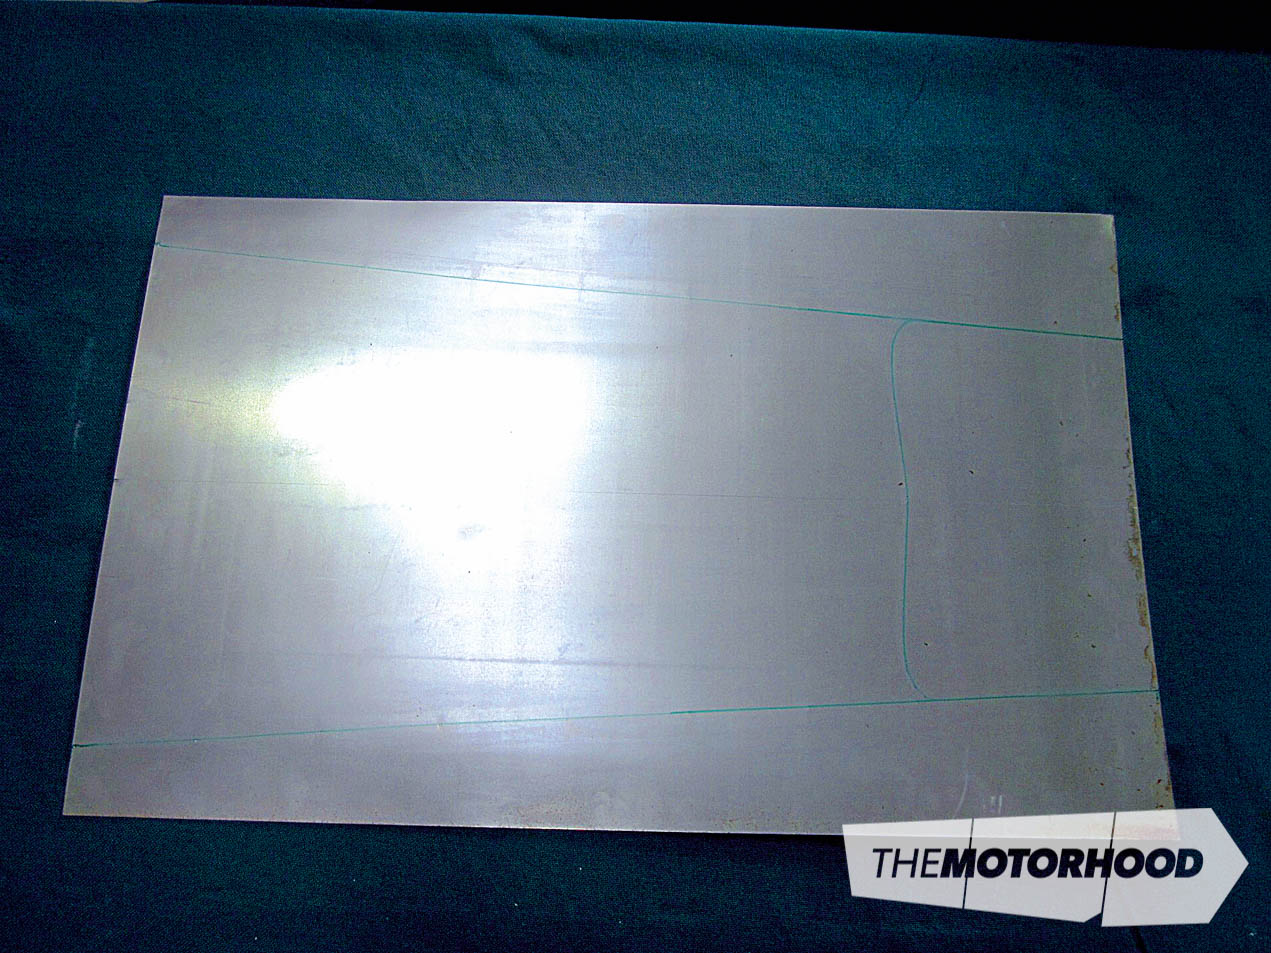
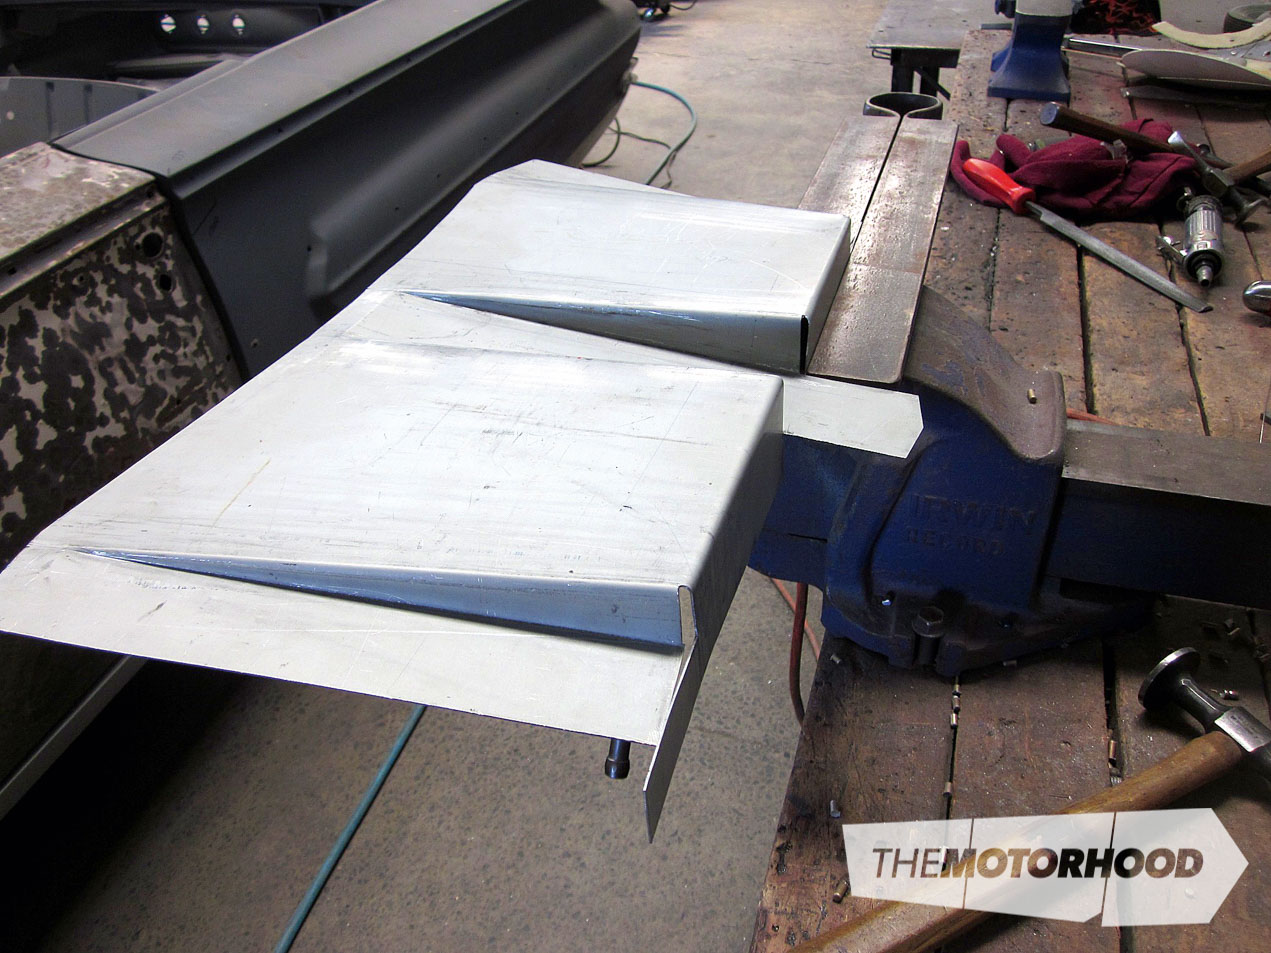
Next, we start the front section. Scribing a centre line both on top and underneath gives us a reliable permanent reference we can measure from at any point. Then we go ahead and draw detailed lines based on the information gathered from the mapped-out part.
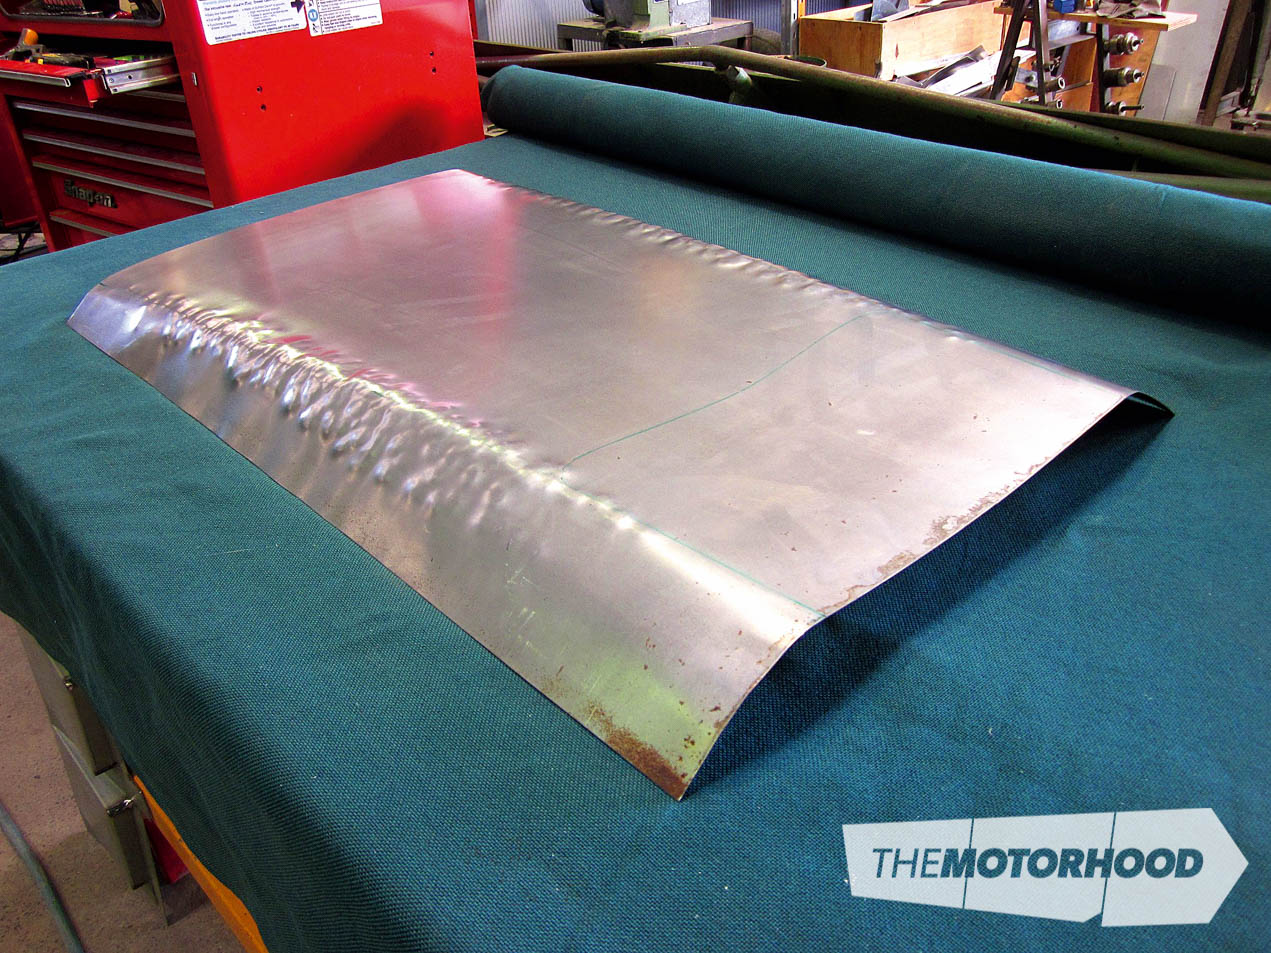
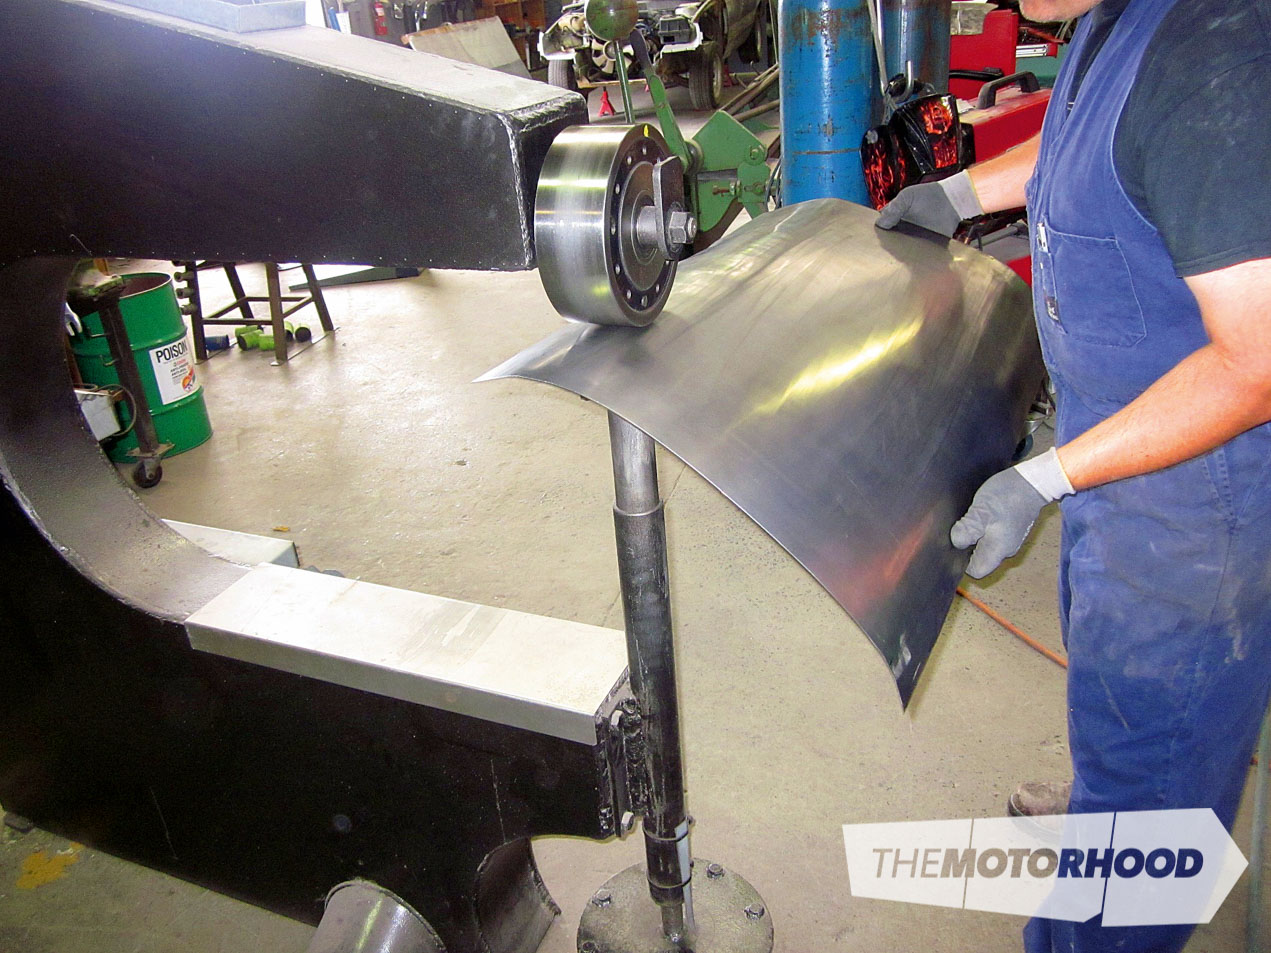

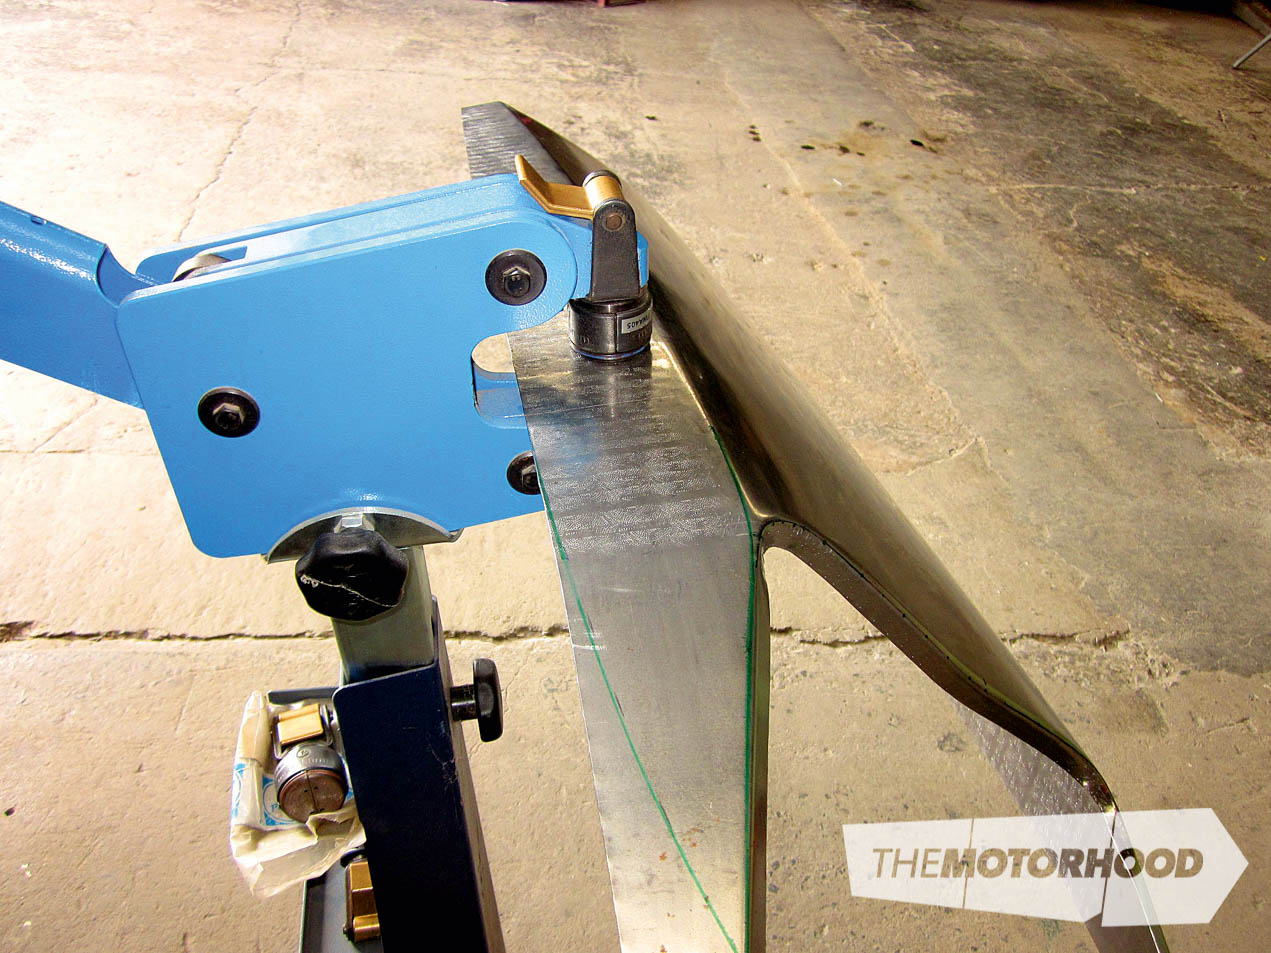

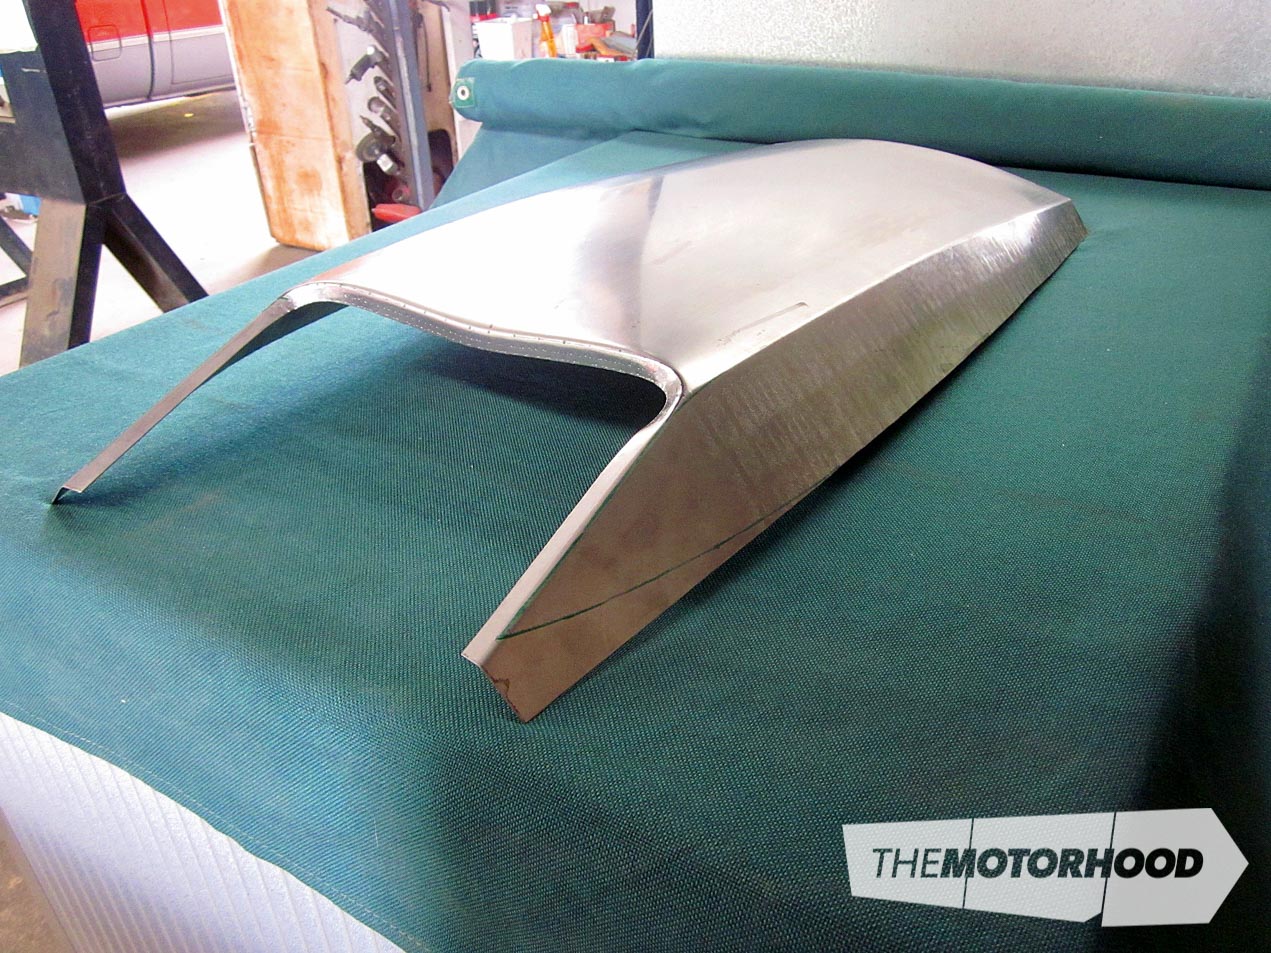


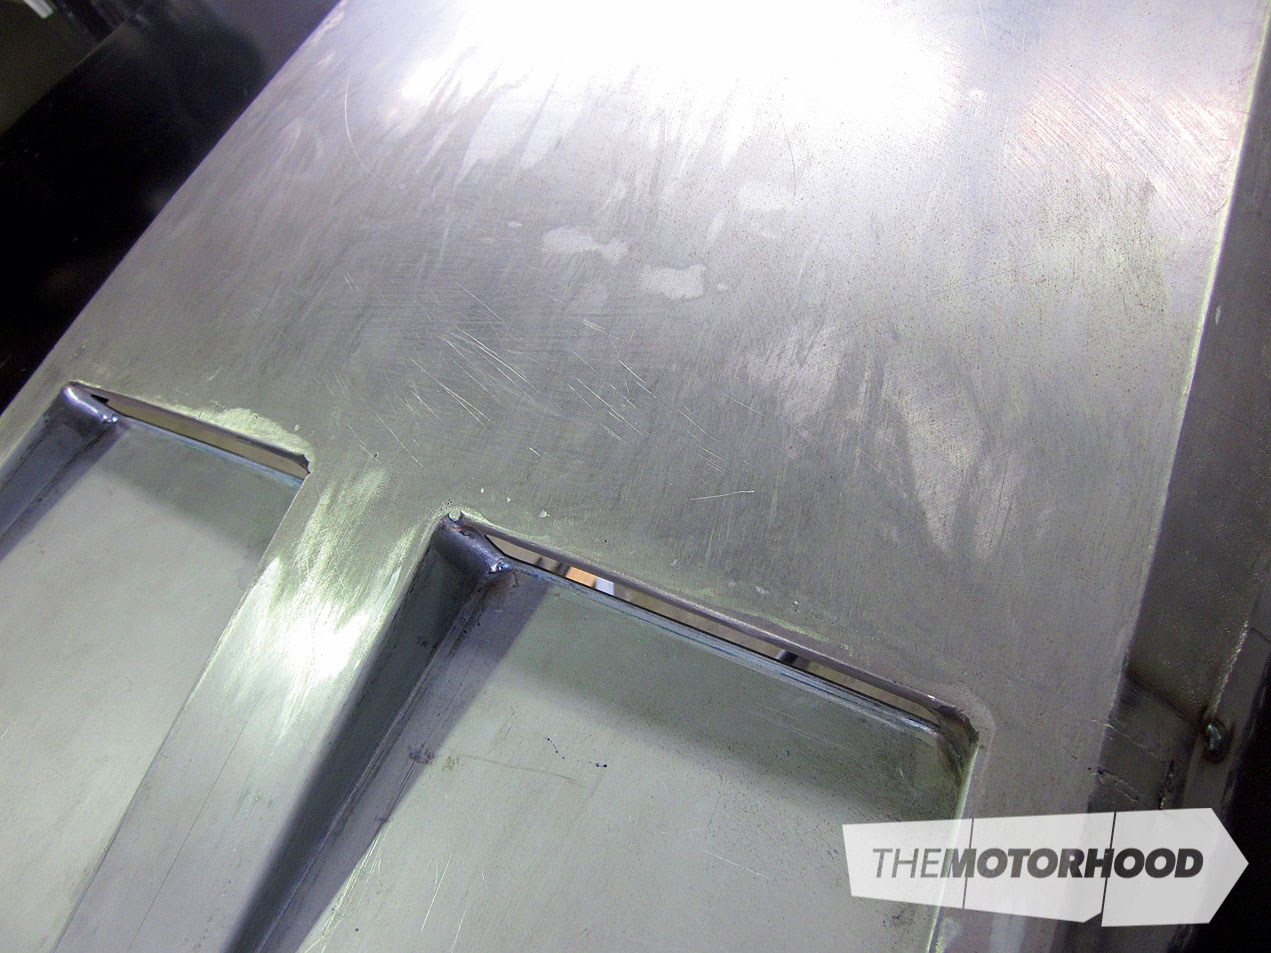
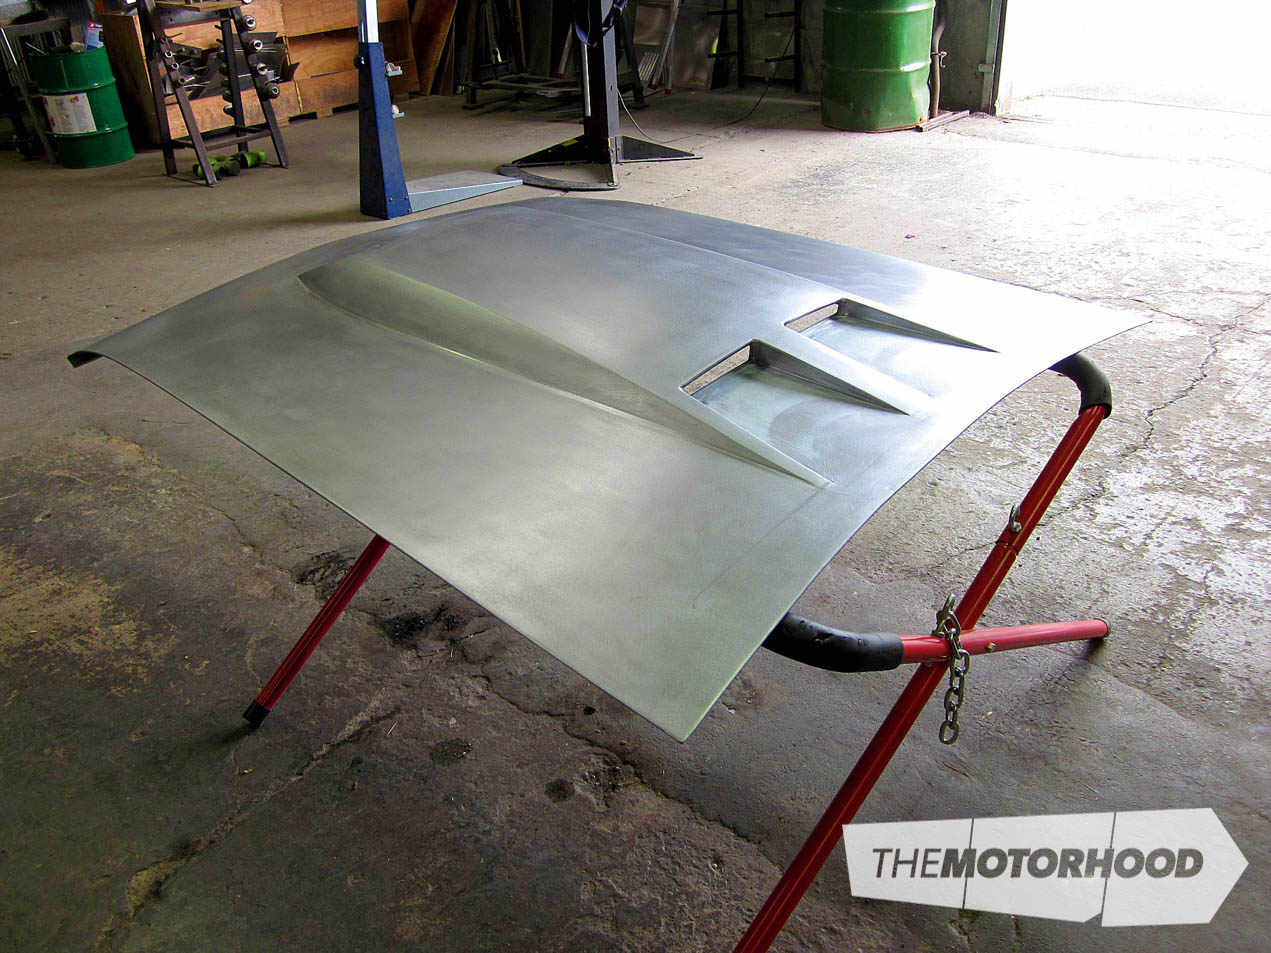
Once cut down, the forming starts by blocking out through the top fold lines followed by some wheeling in the English Wheel to dress out the hammer marks. Next, we tip the fold line along the top edge of the scoop — the English Wheel is also used for this process — then the shrinker is used to tweak the sides around to achieve the desired top radius line. Last of all, we strengthen the front edge with 10mm by 3mm flat bar, making sure to cover both surfaces in Por-15 so there’s no bare metal on metal contact to encourage rust. At this point, we weld the front and rear section together, completing the scoop.
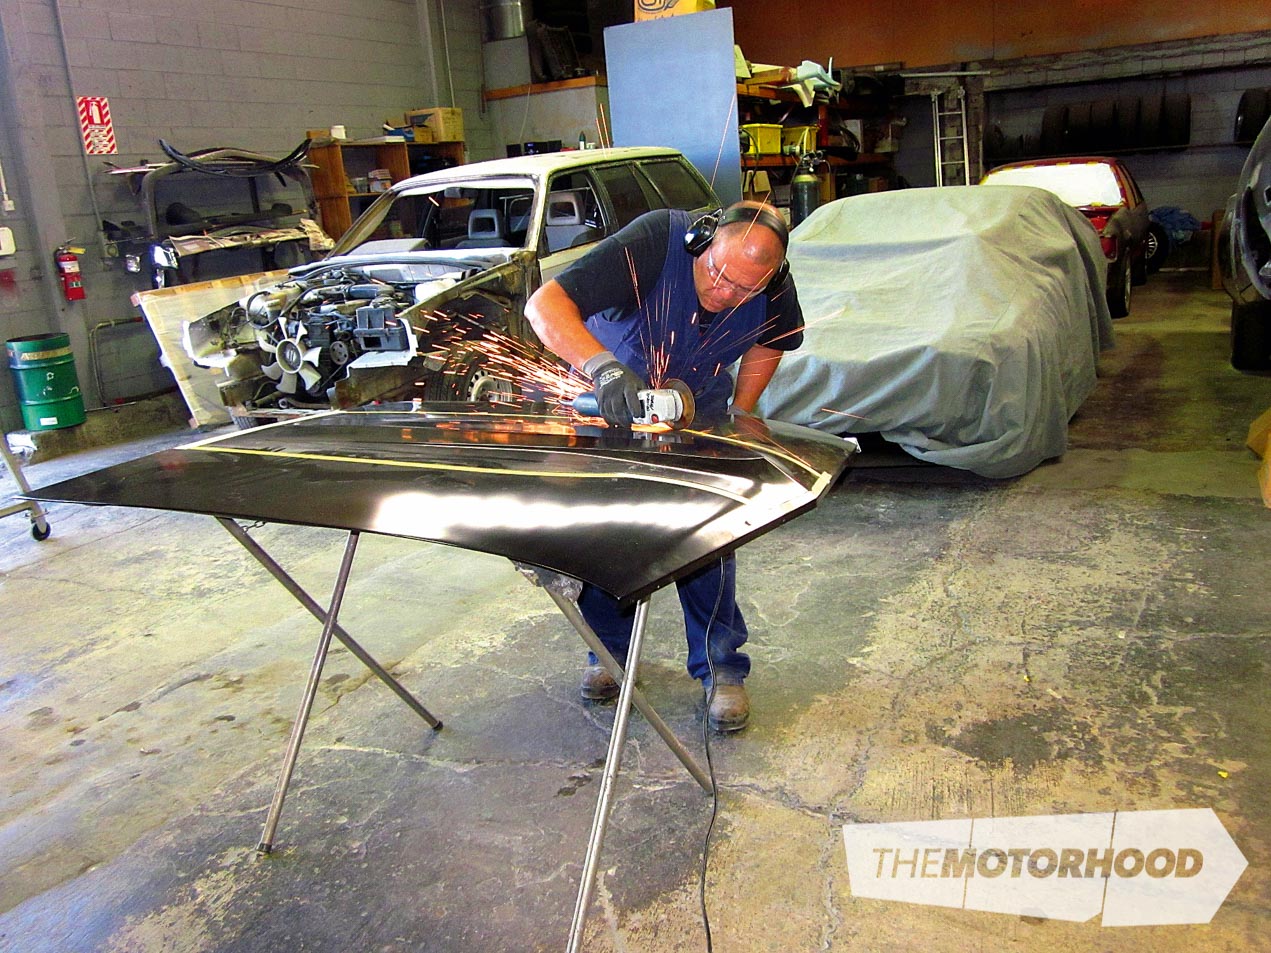
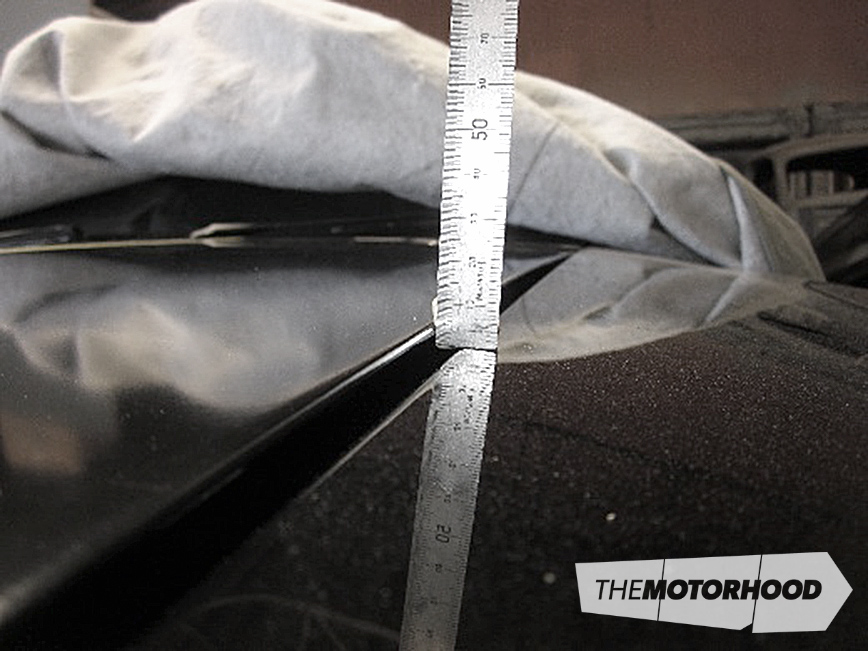
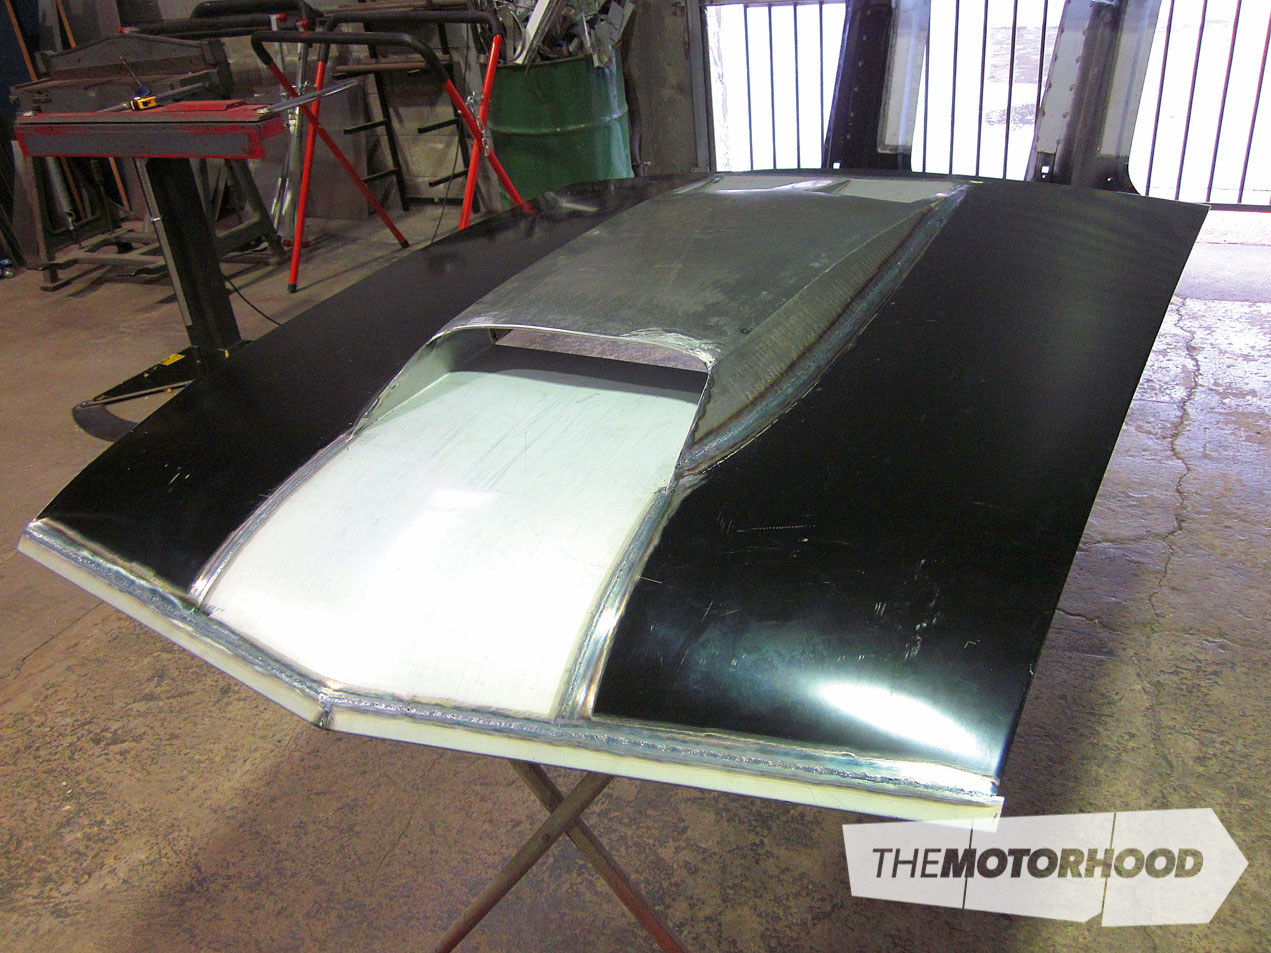
On to the bonnet: first up, we mark and cut the hole. Fortunately, since we’re replacing the whole centre section of the bonnet, it’s now split in two, making it easy to remove the skin from the frame and enabling us to get the individual sides of the bonnet to the English wheel so we can tip the inside edges upwards to meet the sides of the scoop. At this point, we also remove the peak that was causing the hood not to fit very well to begin with.
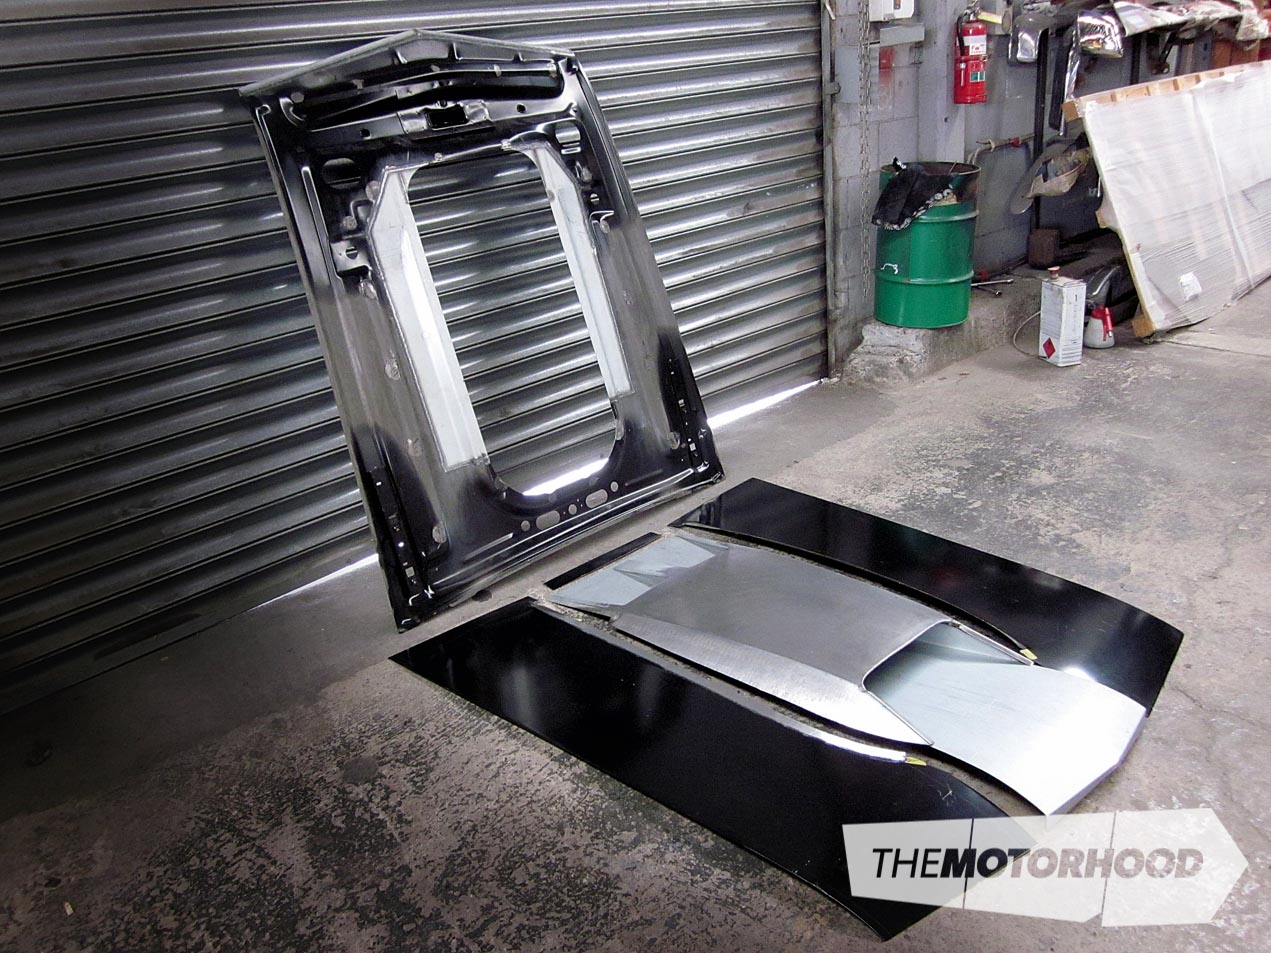
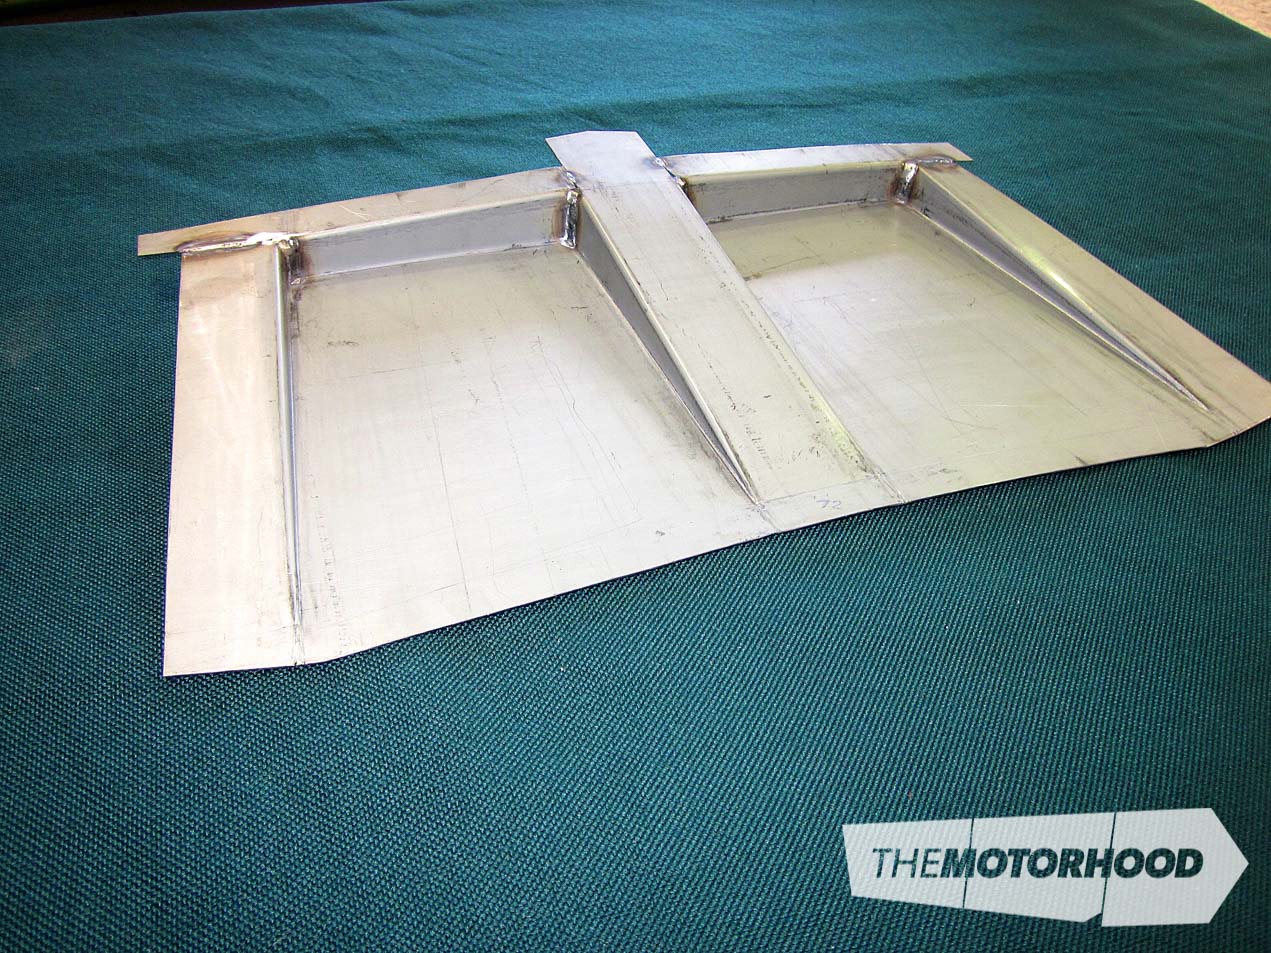
Here are the five parts ready for assembly; 50 hours into the job so far.
Next, we need to make the new front end, which will eliminate the stock bulge in the hood. Now we’re able to mock-fit the scoop to the bonnet, adjust the fold lines, confirm measurements front to rear and left and right, run final cut lines, and weld the whole thing together. Our preference after tacking is to run continuous weld without stopping. As long as your prep is good and you have zero gap, the welds will go well and any distortion that may occur is easily taken care of.

Once we’ve carried out all the necessary mods to the bonnet frame, we cut it in half vertically so we can get it back inside the (still folded) edges of the bonnet skin. Before final assembly, we give the skin/scoop a quick hammer and file, keeping in mind there will still be some filler used for final straightening. To hammer and file this part to a paint-ready finish would add at least two days to the job.
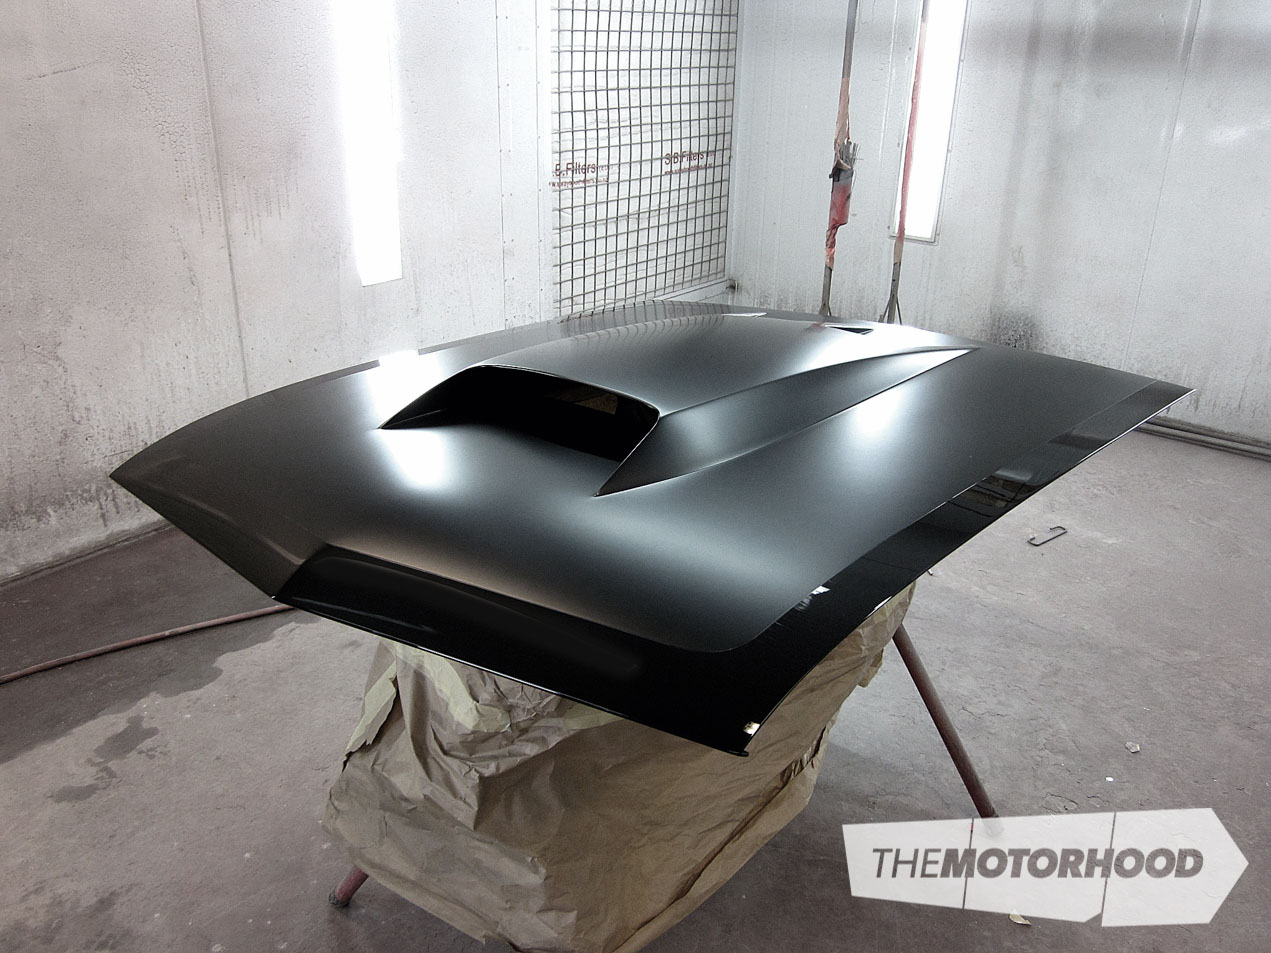
Once we are happy with the finishing work, the bonnet is reassembled and trial-fitted to the car. All up, there are over eight metres of TIG weld in this bonnet. We also replace the factory glue spots between the skin and frame, using the correct 3M non-shrinking foam-type adhesive.
With the hard work done, we simply (compared with the rest of the job) extend the front end of the hood to allow for the stock trim to be removed. Again, there’s plenty of work involved in this, as the frame also requires modification. The result is well worth it, though: it now looks a whole lot smoother than stock, yet, when it is painted, not many people would pick up the reason why.

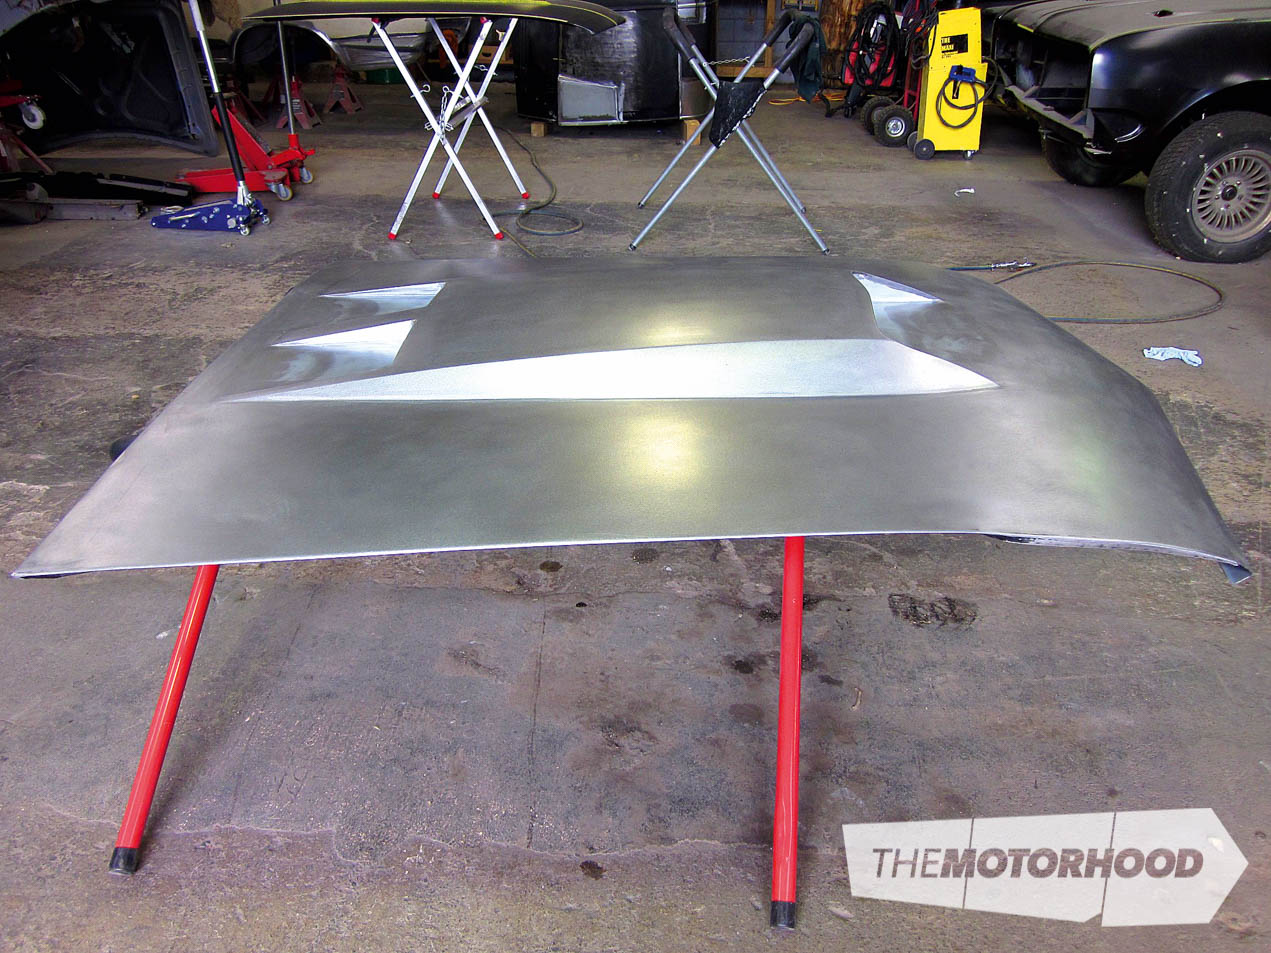

With the paint stripped back and the welds cleaned up, you’d never know the hood didn’t leave the factory this way, which is exactly what the customer was after. Another test fit on the car shows that it all fits as it should.
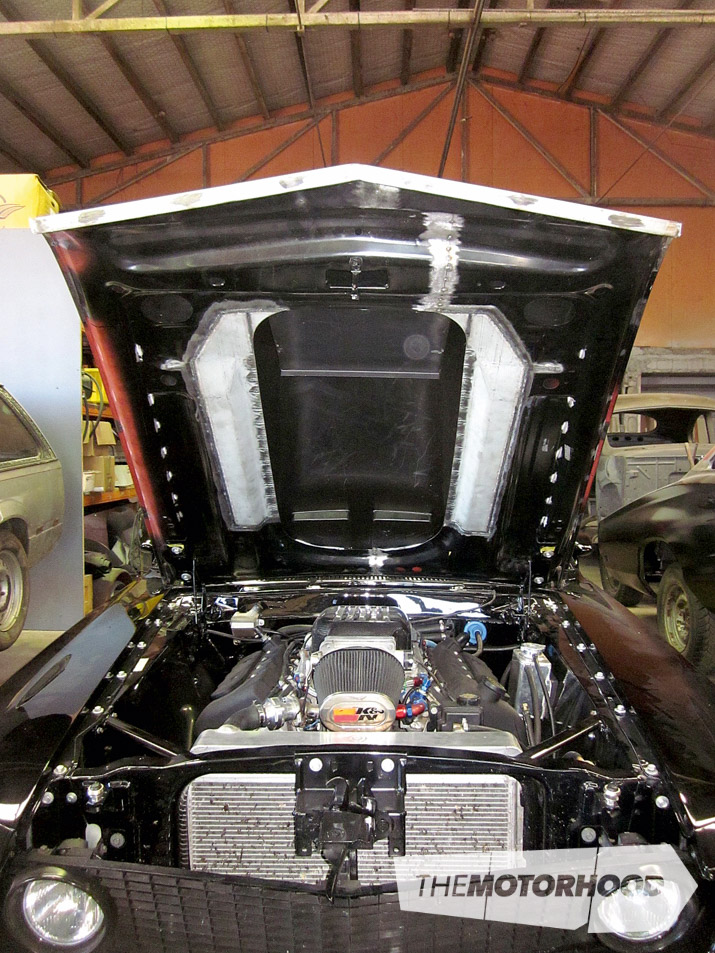
You can see the vertical cut and the strengthening put into the underside of the hood, both to hold it in place and to make sure it looks factory when the hood is open. A coat of paint later, by our in-house paint shop, and you wouldn’t know it had ever been played with.
Overview

There was a high degree of difficulty with this job for several reasons, the main one being that it’s a moving part (opens and closes), which means it has to hold its own weight, close, and fit in the hole, all to a high standard. This type of work is not for the faint-hearted. It has a large skilled-labour content and requires total commitment from both the client and the tradespeople. The upside is that it’s very satisfying work to complete.
Thanks to Paul from Bodymods for his help with this article. If you’re in need of any custom metalwork, give him or his team a call on 07 847 1001, and keep an eye on Bodymods’ Facebook page for regular updates.
This article was originally published in NZV8 Issue No. 111. You can pick up a print copy or a digital copy of the magazine below: